Abhinav Mishra is the Founder and Editor-in-Chief of Samsung Mobile. With a background in Information Technology and over 15 years of experience in the tech industry, he has worked across product development, digital strategy, and technology journalism. Abhinav is recognized for his deep knowledge of the Samsung ecosystem and has been featured in several tech panels and publications for his insights. At Samsung Mobile, he oversees editorial direction, ensures content quality, and leads the team of writers. Outside of work, he enjoys reading about emerging technologies, mentoring young professionals, and spending time with his family.
Learn how to sync Google Photos to your Samsung AI TV with our step by step guide. Relive memories in 4K using the new 2026 native integration and Smart View.
Master the Nano Banana Pro image generation model. Learn how to create, edit, and refine high-fidelity AI images with this comprehensive step-by-step guide.
Learn how to use professional telephoto adapters to overcome smartphone camera hardware limits. Fix zoom quality and master long-range mobile photography today.
Samsung Galaxy Watch 7 and Galaxy Watch Ultra users can unlock hidden features like Double Pinch gestures, heart rhythm alerts, and personalized heart rate zones to improve daily use and fitness tracking.
Samsung starts pushing the stable One UI 8 update, based on Android 16, to Galaxy S23, S23+, and S23 Ultra users. Check new features and rollout details.
Learn how to use voice typing offline on your Samsung Galaxy phone. This guide covers enabling settings, downloading language packs, and troubleshooting.
Unleash the power of AI photo editing on your Samsung Galaxy S25! Learn how to use Generative Edit, Object Eraser, Scene Optimizer, and more for stunning results.
Discover various ways to unlock powerful hidden features on your Samsung Galaxy device without enabling Developer Options, enhancing your user experience.
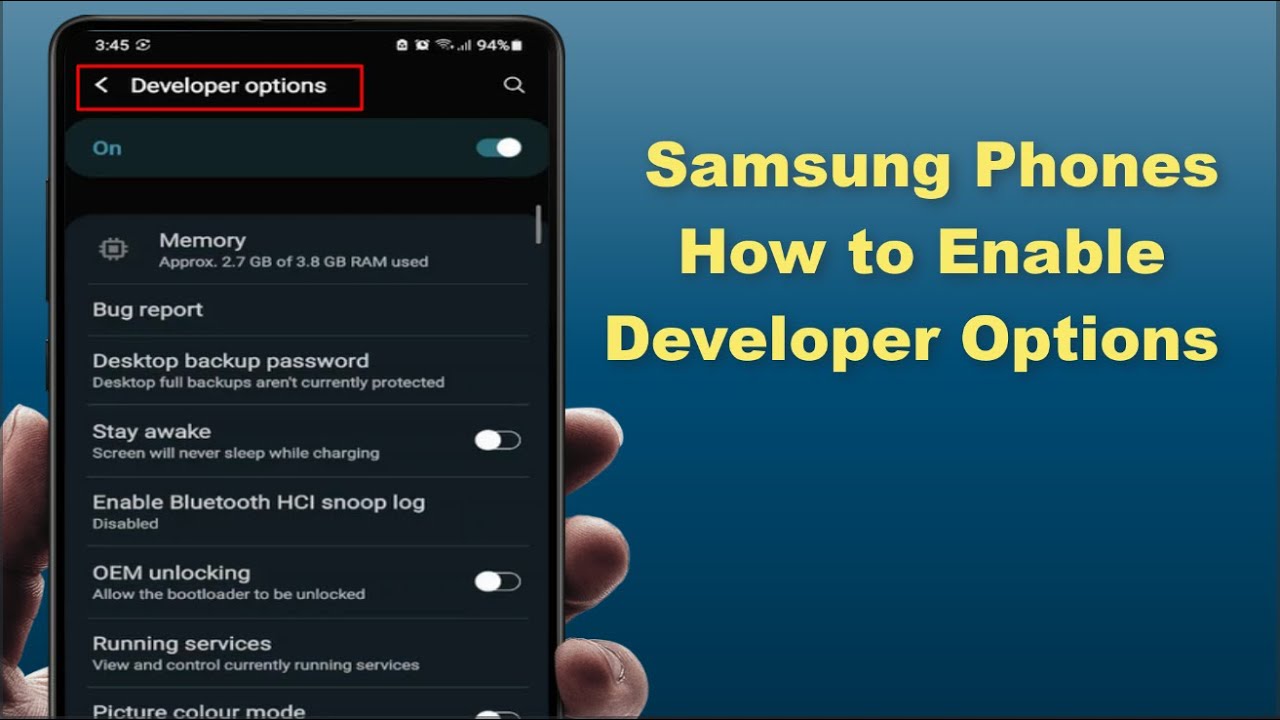
Unlock hidden settings on your Samsung phone by enabling Developer Options. This guide provides a simple, step-by-step process for accessing advanced features.