Keeping your Samsung Galaxy device’s software up to date is crucial for optimal performance, enhanced security, and access to the latest features. While most Samsung phones receive automatic over-the-air (OTA) updates, there are times when you might need or want to update your Samsung software manually. This detailed guide will walk you through various methods, from the simplest to more advanced techniques.
Why Update Your Samsung Software?
Software updates, often encompassing Android OS upgrades and Samsung’s One UI enhancements, bring a host of benefits. These include:
- Improved Security: Regular security patches protect your device from new vulnerabilities and threats.
- Performance Enhancements: Updates often optimize system performance, leading to a smoother and faster user experience.
- New Features: Access to exciting new functionalities, UI changes, and app improvements.
- Bug Fixes: Resolves existing software glitches and issues that might be affecting your device.
- Better Compatibility: Ensures your device remains compatible with the latest apps and services.
Before You Begin: Essential Preparations
Before attempting any manual software update, it’s vital to prepare your device to prevent data loss or issues during the process.
- Back Up Your Data: This is the most critical step. You can back up your data using:
- Samsung Smart Switch: This official tool allows you to back up your entire device to a computer.
- Google Drive: Sync your contacts, photos, and other data to your Google account.
- Samsung Cloud: Back up specific data like call logs, messages, and settings.
- External Storage: Transfer important files to an SD card or USB drive.
- Charge Your Device: Ensure your Samsung phone has at least 50% battery life, ideally more. A drained battery during an update can lead to serious problems.
- Stable Internet Connection: For OTA and Smart Switch updates, a strong and stable Wi-Fi connection is highly recommended to avoid download interruptions and data overages.
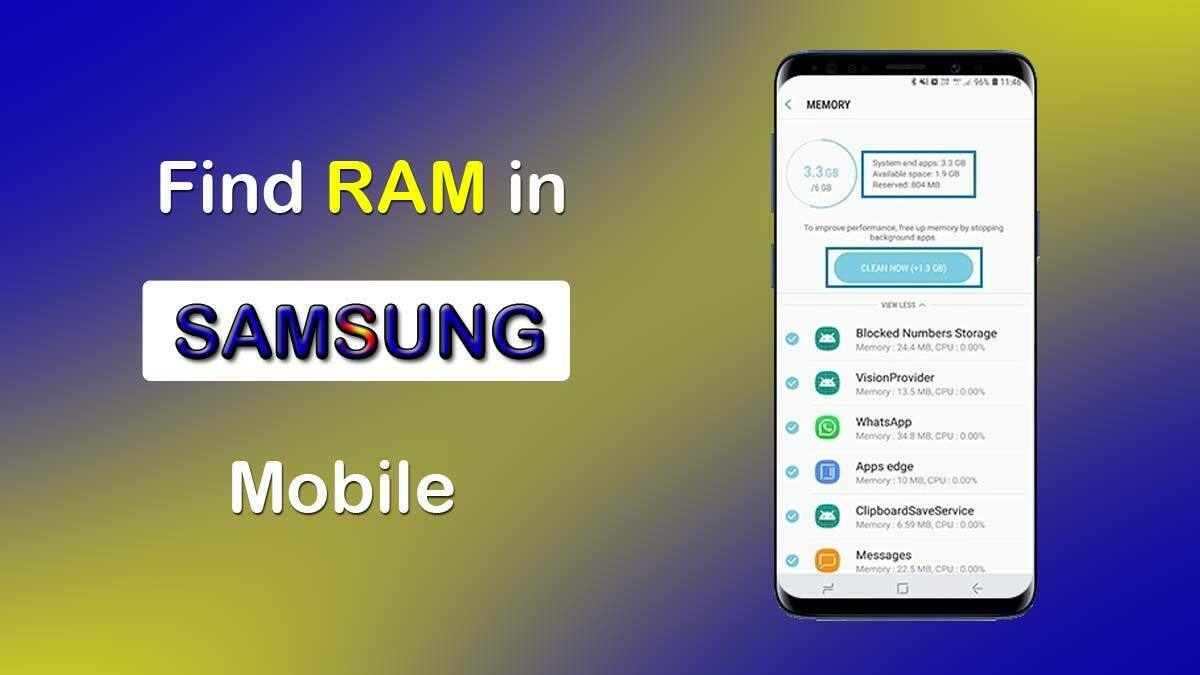
- Sufficient Storage Space: Software updates can be large. Check your device’s available storage and free up space if necessary by deleting unnecessary apps, photos, or videos. Your device will usually tell you how much space is needed.
- Identify Your Device Model and Current Software Version: This information is crucial, especially for advanced methods like Odin.
- Go to Settings > About phone > Software information. Note down your Model number, Android version, and Build number.
Method 1: Update Through Device Settings (The Easiest Way)
This is the most common and simplest way to check for and install updates. Even if you’re looking to update manually, this should always be your first stop.
- Open the Settings app on your Samsung Galaxy device.
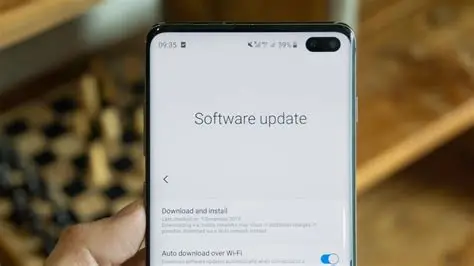
- Scroll down and tap on Software update (or sometimes “System updates” depending on your model/carrier).
- Tap on Download and install.
- Your device will now check for available updates.
- If an update is found, it will begin downloading automatically. You might need to tap “Download now” or “Install now” to proceed.
- If your device is already up to date, you’ll see a message confirming this.
Tip: While OTA updates are usually pushed in waves, checking manually can sometimes trigger the download if it’s already available for your region and model.
Method 2: Update Using Samsung Smart Switch (PC/Mac)
Samsung Smart Switch is a powerful tool that not only helps transfer data but also allows you to update your device’s software via your computer. This method is particularly useful if you’re having trouble with OTA updates or want a more stable download experience.
What You’ll Need:
- A computer (Windows PC or Mac)
- Samsung Smart Switch software installed on your computer. You can download it from the official Samsung website.
- Your Samsung Galaxy device.
- The original USB cable that came with your device.
Steps:
- Install Smart Switch on your computer if you haven’t already.
- Connect your Samsung device to your computer using the USB cable.
- Open Samsung Smart Switch on your computer. It should automatically detect your connected device.
- If a software update is available for your device, Smart Switch will usually automatically prompt you to update. You’ll see an “Update” button or a notification.
- Click Update and follow the on-screen prompts to download and install the necessary files.
- The update process will begin, and your device may restart several times. Do not disconnect your device or use it during this process.
- Once the update is complete, your device will return to the Home screen, and Smart Switch will confirm the successful update.
Method 3: Manual Firmware Flashing Using Odin (Advanced Users Only)
This method involves manually flashing firmware files onto your Samsung device using a tool called Odin. This is an unofficial but widely used method, primarily for:
- Installing a specific firmware version (e.g., if you want to downgrade or install a regional firmware).
- Unbricking a soft-bricked device.
- Installing beta software or custom ROMs (though this guide focuses on official firmware).
WARNING: Using Odin incorrectly can potentially brick your device. Proceed with extreme caution and only if you are comfortable with technical procedures. This method will likely wipe your device’s data if you don’t select HOME_CSC, so a full backup is absolutely essential.
What You’ll Need:
- A Windows PC.
- Samsung USB Drivers installed on your PC.
- Odin flash tool (typically Odin3). You can find reliable versions on forums like XDA Developers. Be cautious of unofficial download sources.
- The correct firmware file for your specific Samsung device model and region. Firmware files are usually in .tar or .tar.md5 format.
- Recommended Firmware Download Sites:
- SamFw.com
- SamMobile.com (requires an account, often slow downloads for free users)
- Frija: A tool to download firmware directly from Samsung servers (often faster than manual downloads from websites).
- Recommended Firmware Download Sites:
Steps:
- Download and Install Samsung USB Drivers on your PC.
- Download Odin and extract the zip file.
- Download the correct firmware for your device. Ensure the model number and region (CSC) match precisely. The firmware typically comes as a .zip file containing several files (AP, BL, CP, CSC, HOME_CSC). Extract these files.
- Boot your Samsung device into Download Mode:
- For newer devices (no physical home button): Power off your device. Press and hold Volume Up + Volume Down buttons, then connect your device to your PC via USB cable. Keep holding the buttons until you see the Download Mode screen.
- For older devices (with physical home button): Power off your device. Press and hold Volume Down + Home + Power buttons simultaneously until you see the Download Mode screen.
- On the warning screen, press Volume Up to continue.
- Open Odin on your PC (run as administrator).
- Connect your Samsung device to your PC using the USB cable. In Odin, you should see an “Added!!” message in the Log tab, and the ID:COM box will turn blue or yellow, indicating your device is recognized.
- Load the firmware files into Odin:
- Click the BL button and select the file starting with BL_.
- Click the AP button and select the file starting with AP_. This file is usually the largest.
- Click the CP button and select the file starting with CP_.
- Click the CSC button. Crucially, if you want to retain your data, select the HOME_CSC_ file. If you want to perform a clean install and wipe all data, select the regular CSC_ file.
- Go to the Options tab in Odin. Ensure that Auto Reboot and F. Reset Time are checked. Do NOT check “Re-Partition” unless you know exactly what you are doing.
- Double-check everything: device in Download Mode, correct firmware files loaded, Odin recognizes the device, and options are set correctly.
- Click the Start button in Odin. The flashing process will begin.
- Do NOT disconnect your device, use your PC, or close Odin during this process.
- Once the flashing is complete, Odin will show a “PASS!” message, and your device will automatically reboot. You can then disconnect your phone.
- After the phone reboots, it might take longer than usual for the first boot as it optimizes the new software.
After Flashing with Odin (Recommended):
- Wipe Cache Partition: This helps prevent potential issues after a manual flash.
- Power off your device.
- Boot into Recovery Mode: Press and hold Volume Up + Power (and Bixby button for some models) until the Samsung logo appears, then release buttons.
- Navigate using Volume buttons and select with the Power button.
- Select Wipe cache partition.
- Select Yes.
- Select Reboot system now.
Common Issues and Troubleshooting
Even with careful steps, issues can arise during a software update. Here are some common problems and their solutions:
- “Update Not Available” or “Device is Up to Date” (When you know it’s not):
- Updates are often rolled out in phases. You might need to wait a few days or weeks.
- Your carrier might be delaying the update.
- Try updating via Smart Switch.
- Ensure your device is connected to a stable Wi-Fi network. Some updates are too large for mobile data.
- If your device is SIM-unlocked, you might need a SIM from the original carrier to receive updates.
- Insufficient Storage:
- Delete old photos, videos, apps, or clear cache to free up space. Your device will usually specify the required space.
- Update Failed/Stuck During Download/Installation:
- Reboot your device and try again.
- Ensure a stable Wi-Fi connection.
- Try updating using Samsung Smart Switch.
- If all else fails and your device is functional, consider a factory reset (after backing up data) and then try updating again. If the device is soft-bricked, Odin might be your only option.
- Increased Battery Drain or Performance Issues After Update:
- This can sometimes happen as the device optimizes the new software. Give it a few days.
- Wipe cache partition (as described after Odin steps). This often resolves post-update glitches.
- Review app permissions and disable background activity for problematic apps.
- As a last resort, consider a factory reset (after backing up data).
- Odin Fails / “FAIL!” Message:
- Ensure you have the correct firmware for your exact model and region.
- Use the correct Odin version.
- Ensure Samsung USB Drivers are properly installed and updated.
- Try a different USB port on your PC.
- Try a different USB cable.
- Disable antivirus or firewall software temporarily on your PC.
- Run Odin as administrator.
Manually updating your Samsung software can seem daunting, but by following these steps carefully, you can ensure your device stays current, secure, and performing at its best. Always prioritize data backup and proceed with caution, especially with advanced methods.

