Category: Uncategorized

  • How to Free Up Space on Samsung device

    How to Free Up Space on Samsung device

    Running out of storage on your Samsung phone or tablet can be a real headache. Suddenly, you’re unable to install app updates, take new photos, or even receive messages. But before you panic or start deleting things randomly, take a deep breath. There are smarter ways to reclaim that valuable storage.

    This guide walks you through practical, straightforward steps to help you clear space and get your device running more smoothly again.

    1. Clear Your Cache Data

    Let’s start with something simple: cached data. Apps often store temporary files to speed up loading, but over time, these files pile up.

    • Clear individual app cache:
      1. Open Settings.
      2. Tap Apps.
      3. Select an app (think Chrome, Instagram—your usual suspects).
      4. Tap Storage.
      5. Tap Clear cache.

    Pro Tip: Focus on the apps you use most. They tend to accumulate the most data.

    • Clear all app cache (if available): On some older Samsung models or certain One UI versions, you might find an option to clear all cached data:
      • Head to Settings > Device care > Storage > Advanced or Storage > Clean Now. If you don’t see it, no worries—just stick to clearing individual app caches.
    1. Uninstall Unused Apps

    Chances are you’ve downloaded apps you haven’t touched in months. They’re just sitting there, quietly eating up storage.

    • Remove them like this:
      1. Go to Settings.
      2. Tap Apps.
      3. Scroll through and spot apps you no longer use.
      4. Tap the app.
      5. Tap Uninstall, then confirm.

    Expert Insight: Don’t just judge by app size—ask yourself when you last opened it. If you can’t remember, it’s probably safe to let go.

    1. Manage Your Photos and Videos

    Photos and videos are often the biggest storage hogs. But do you really need all of them?

    • Delete what you don’t need:
      1. Open the Gallery app.
      2. Browse your albums.
      3. Select items like blurry shots, old screenshots, or duplicates.
      4. Tap the trash icon and confirm.

    Note: Deleted items often go to the Trash or Recycle Bin and stay there for 30 days. Be sure to empty it.

    • Use cloud storage:
      • Google Photos:
        • Download the app.
        • Enable Backup & sync.
        • Use “Free up device space” after backup.
      • Samsung Cloud:
        • Go to Settings > Accounts and backup > Samsung Cloud.
        • Back up your media, then delete local copies.
      • OneDrive:
        • If it’s integrated, enable syncing and remove local files afterward.
    1. Move Files to an SD Card (If Available)

    If your device has a microSD slot, use it. It’s an easy way to offload large files.

    • Transfer files to SD card:
      1. Open My Files.
      2. Go to Internal storage > DCIM or Downloads.
      3. Select what you want to move.
      4. Tap Move or Copy > select SD card.
    • Set camera to save to SD card:
      1. Open the Camera app.
      2. Tap the Settings gear.
      3. Look for Storage location and set it to SD card.
    1. Utilize Smart Storage Features

    Samsung offers built-in tools through Device care to manage storage more intelligently.

    • To access it:
      1. Go to Settings.
      2. Tap Device care (or Battery and device care).
      3. Tap Storage.

    Here’s what you’ll find:

      • Clean Now: Deletes cache, residual files, and ad junk.
      • Large files: Highlights big space consumers.
      • Duplicate files: Flags and lets you delete clones.
      • Unused apps: Suggests apps you haven’t opened in a while.
    1. Try Files by Google

    This free app from Google is surprisingly sharp at detecting clutter.

    • How to use it:
      1. Install Files by Google from the Play Store.
      2. Open it and allow permissions.
      3. Go to the Clean tab.
      4. Review suggestions like:
        • Junk files
        • Duplicates
        • Memes
        • Large files
        • Old screenshots
        • Unused apps
      5. Tap Clean or Delete as needed.

    From experience: It often finds hidden junk that Samsung’s tools overlook.

    1. Clear Your Downloads Folder

    This one’s easy to forget. Downloads often pile up unnoticed.

    • To clean it up:
      1. Open My Files.
      2. Tap Downloads.
      3. Review and delete unnecessary files.
    1. Factory Reset (Last Resort)

    Still struggling after all that? A factory reset might be the nuclear option—but it’s effective.

    • Before resetting:
      • Back up everything—photos, contacts, messages, app data—using Samsung Cloud, Google Drive, or a PC.
    • To reset:
      1. Go to Settings.
      2. Tap General management.
      3. Tap Reset > Factory data reset.
      4. Review, then tap Reset device > Delete all.

    Final Thoughts

    Freeing up space doesn’t have to be stressful. By following these steps regularly, you’ll keep your Samsung device running smoothly and avoid storage headaches down the road. A bit of digital spring cleaning now and then really does go a long way.

  • How to Use a Samsung Device

    How to Use a Samsung Device

    Using a Samsung device for the first time can be both exciting and overwhelming. Samsung’s Galaxy series—ranging from smartphones and tablets to wearables—offers a wealth of features designed to enhance your daily life. This comprehensive guide will walk you through the essential steps to set up and use your Samsung device effectively.

    1. Powering On and Initial Setup

    Step 1: Turn On the Device

    • Press and hold the Power button until the Samsung logo appears.

    Step 2: Select Language and Region

    • Choose your preferred language and region to proceed.

    Step 3: Connect to Wi-Fi

    • Select your Wi-Fi network and enter the password to connect.

    Step 4: Sign in to Google Account

    • Enter your Google credentials to access Google services and the Play Store.

    Step 5: Sign in to Samsung Account

    • Create or log in to your Samsung account to access exclusive features like Samsung Cloud and Galaxy Store.

    Step 6: Restore Data

    • If you’re switching from another device, use Samsung Smart Switch to transfer data seamlessly.
    1. Navigating the Interface

    Home Screen and App Drawer

    • Swipe up from the bottom to access the App Drawer.
    • Swipe down from the top to view Notifications and Quick Settings.

    Navigation Options

    • Choose between Gesture Navigation and Button Navigation:
      • Go to Settings > Display > Navigation bar to select your preference.
    1. Customizing Your Device

    Themes and Wallpapers

    • Personalize your device by navigating to Settings > Wallpaper and style.
    • Download themes and wallpapers from the Galaxy Themes store.

    Widgets and Home Screen Layout

    • Long-press on the home screen to add widgets or change the layout.

    Edge Panels

    • Enable Edge Panels for quick access to apps and tools:
      • Go to Settings > Display > Edge panels.
    1. Essential Features and Settings

    Battery Optimization

    • Extend battery life by enabling Power Saving Mode:
      • Navigate to Settings > Battery and device care > Battery > Power saving.

    Security Settings

    • Set up Biometric Authentication for added security:
      • Go to Settings > Biometrics and security to configure fingerprint or facial recognition.

    Digital Wellbeing

    • Monitor your device usage and set app timers:
      • Access Settings > Digital Wellbeing and parental controls.
    1. Utilizing Samsung Apps and Services

    Samsung Notes

    • Create and manage notes with text, images, and voice recordings.

    Samsung Health

    • Track your fitness activities, monitor health metrics, and set wellness goals.

    Samsung Pay

    • Add your credit or debit cards to make secure payments using your device.
    1. Advanced Tips and Tricks

    Bixby Routines

    • Automate tasks based on your usage patterns:
      • Go to Settings > Advanced features > Bixby Routines.

    Secure Folder

    • Protect sensitive data by storing it in a secure, encrypted space:
      • Access Settings > Biometrics and security > Secure Folder.

    Screen Recording

    • Record your screen activity for tutorials or demonstrations:
      • Swipe down to access Quick Settings and tap Screen Recorder.
    1. Keeping Your Device Updated

    Software Updates

    • Ensure your device runs smoothly by installing the latest updates:
      • Navigate to Settings > Software update > Download and install.

    Galaxy Store Updates

    • Update Samsung apps by opening the Galaxy Store, tapping the Menu, and selecting Updates.
    1. Troubleshooting Common Issues

    Device Running Slow

    • Clear cache and unnecessary files:
      • Go to Settings > Battery and device care > Optimize now.

    App Crashes

    • Update the app via the Galaxy Store or Google Play Store.
    • If issues persist, clear the app’s cache:
      • Navigate to Settings > Apps > [App Name] > Storage > Clear cache.

    Connectivity Problems

    • Reset network settings:
      • Go to Settings > General management > Reset > Reset network settings.
    1. Accessing Help and Support

    Samsung Members App

    • Get personalized support, diagnostic tools, and community forums.

    User Manual

    • Access the digital user manual directly from your device:
      • Navigate to Settings > Tips and user manual > User manual.

    Customer Support

    • Contact Samsung support via chat, phone, or visit a Samsung Experience Store for in-person assistance.

    By following this guide, you’ll be well-equipped to make the most of your Samsung device’s features and capabilities. Regularly exploring settings and updates will ensure your device remains optimized and secure.

  • How to Unlock Samsung Phone When Forgot Pattern

    How to Unlock Samsung Phone When Forgot Pattern

    Forgetting the unlock pattern on your Samsung phone can be frustrating and stressful. Fortunately, there are several methods to regain access without losing your data. This detailed how-to guide covers all possible solutions to unlock your Samsung device safely and efficiently.

    Step 1: Try Samsung’s “Find My Mobile” Service

    If you have a Samsung account linked to your phone and Find My Mobile enabled, this is the easiest way to unlock your device remotely.

    How to Use Find My Mobile:

    1. Visit Samsung Find My Mobile on any browser.
    2. Log in with your Samsung account credentials.
    3. Select your locked device from the list.
    4. Click on Unlock.
    5. Follow the on-screen instructions to unlock your phone remotely.

    Note: This method requires your phone to be powered on and connected to the internet.

    Step 2: Use Google’s “Find My Device” to Reset Lock

    If your Samsung phone is linked to your Google account, you can reset the lock remotely through Google’s Find My Device service. However, this method erases all data on your device.

    How to Use Find My Device:

    1. Visit Google Find My Device.
    2. Sign in with your Google account linked to the phone.
    3. Select your locked Samsung device.
    4. Choose Erase Device to factory reset your phone.

    Warning: This will delete all personal data on the device. Use this only if data loss is acceptable.

    Step 3: Use Samsung’s Smart Lock (If Enabled)

    If you have previously enabled Smart Lock, your device may unlock automatically in trusted situations, such as being connected to a trusted Wi-Fi network or device.

    How to Use Smart Lock:

    • Try to connect your phone to a trusted Bluetooth device.
    • Bring your phone to a trusted location like your home.
    • If Smart Lock is active, the phone may unlock without entering the pattern.

    Step 4: Use Recovery Mode to Factory Reset (Last Resort)

    If the above options don’t work and you cannot unlock your phone, a factory reset via Recovery Mode is the final option. This will erase all data on your device.

    How to Perform a Factory Reset:

    1. Power off your Samsung phone completely.
    2. Press and hold the Volume Up button and the Power (Side) button simultaneously.
    3. Release the buttons when the Samsung logo or recovery menu appears.
    4. Use volume buttons to navigate to Wipe data/factory reset.
    5. Press the Power button to select.
    6. Confirm the reset by selecting Yes.
    7. After the reset completes, select Reboot system now.

    Note: After factory reset, you will need to log in with the Google or Samsung account previously linked to the device due to Factory Reset Protection (FRP).

    Step 5: Contact Samsung Support or Visit a Service Center

    If none of the above methods work or you want professional help, contact Samsung customer support or visit an authorized service center.

    What to Expect:

    • They may help unlock the device using official tools.
    • Proof of purchase or ownership might be required.
    • Data recovery is usually not guaranteed.

    Additional Tips to Avoid Future Lockouts

    • Always keep your Samsung and Google account credentials handy.
    • Enable Samsung Find My Mobile and Google Find My Device services.
    • Consider using biometric unlocking methods like fingerprint or face recognition.
    • Regularly back up your phone data.

    Conclusion

    Forgetting your Samsung phone’s pattern lock is inconvenient, but various options exist to regain access. Using Samsung’s Find My Mobile is the safest method without data loss. If necessary, factory reset through Recovery Mode remains a reliable last resort. Always safeguard your accounts and data to avoid such issues.

  • How to Calibrate Samsung Curved Monitor for Gaming

    How to Calibrate Samsung Curved Monitor for Gaming

    Calibrating your Samsung curved monitor can significantly enhance your gaming experience by delivering accurate colors, optimal brightness, and sharp visuals. This guide provides a step-by-step approach to calibrate your monitor effectively.

    Step 1: Reset to Factory Settings

    Before making any adjustments, it’s advisable to reset your monitor to its default settings to ensure a clean starting point.

    • Access the OSD Menu: Press the joystick button located typically at the back or bottom of your monitor.
    • Navigate to ‘Menu’ > ‘System’ > ‘Reset All’: Confirm the reset to restore factory settings.

    Step 2: Select the Appropriate Picture Mode

    Samsung monitors offer various picture modes tailored for different scenarios. For gaming, selecting the right mode is crucial.

    • Game Mode: Enhances response time and reduces input lag.
    • FPS Mode: Brightens dark scenes, ideal for first-person shooters.
    • RTS Mode: Optimizes color and contrast for real-time strategy games.

    To select a mode:

    • Access the OSD Menu: Press the joystick button.
    • Navigate to ‘Picture’ > ‘Picture Mode’: Choose the desired mode.

    Step 3: Adjust Brightness and Contrast

    Proper brightness and contrast settings ensure that game visuals are neither too dark nor washed out.

    • Brightness: Adjust to a comfortable level based on your ambient lighting. A starting point is around 70%.
    • Contrast: Set to around 75% to maintain detail in both bright and dark area.

    Adjust these settings via:

    • OSD Menu: ‘Picture’ > ‘Brightness’ or ‘Contrast’.

    Step 4: Fine-Tune Color Settings

    Accurate color reproduction enhances the gaming experience.

    • Color Temperature: Set to ‘Custom’ to manually adjust RGB values.
    • RGB Settings: Start with Red: 50, Green: 50, Blue: 50. Adjust as needed based on your preference.

    Access these settings via:

    • OSD Menu: ‘Picture’ > ‘Color’ > ‘Color Tone’ > ‘Custom’.

    Step 5: Set Gamma Levels

    Gamma settings affect the mid-tones of your display.

    • Gamma Mode 1: Offers a balanced display suitable for most games.
    • Gamma Mode 2 or 3: Use if you prefer brighter or darker mid-tones, respectively.

    Adjust via:

    • OSD Menu: ‘Picture’ > ‘Gamma’.

    Step 6: Configure Black Equalizer

    The Black Equalizer enhances visibility in dark scenes, crucial for spotting enemies in shadowy areas.

    • Set to 13-20: This range improves dark scene visibility without overexposing.

    Adjust via:

    • OSD Menu: ‘Game’ > ‘Black Equalizer’.

    Step 7: Adjust Sharpness

    Sharpness settings affect the clarity of images.

    • Set to 60-70: This range provides clear visuals without introducing artifacts.

    Adjust via:

    • OSD Menu: ‘Picture’ > ‘Sharpness’.

    Step 8: Enable or Disable Dynamic Contrast

    Dynamic Contrast automatically adjusts contrast levels based on screen content.

    • Enable: If you prefer automatic adjustments for varying scenes.
    • Disable: For consistent contrast levels.

    Toggle via:

    • OSD Menu: ‘Picture’ > ‘Dynamic Contrast’.

    Step 9: Utilize Samsung Magic Upscale

    Samsung Magic Upscale enhances image quality, especially for lower-resolution content.

    • Mode 1: Provides subtle enhancement.
    • Mode 2: Offers stronger enhancement.

    Enable via:

    • OSD Menu: ‘Picture’ > ‘Samsung Magic Upscale’.

    Step 10: Calibrate Using Windows Display Settings

    For further refinement, use Windows’ built-in calibration tool.

    1. Open Display Calibration:
      • Press Win + R, type dccw, and press Enter.
    2. Follow the Calibration Wizard:
      • Adjust gamma, brightness, contrast, and color balance as guided.

    Additional Tips

    • Ambient Lighting: Ensure your room lighting complements your monitor settings to reduce eye strain.
    • Regular Calibration: Periodically recalibrate to maintain optimal display performance.
    • Driver Updates: Keep your monitor and graphics card drivers up to date for the best compatibility and performance.

    By following these steps, you can calibrate your Samsung curved monitor to deliver an immersive and visually stunning gaming experience.

  • How to Turn off Samsung Bixby

    How to Turn off Samsung Bixby

    Samsung’s Bixby assistant is integrated into many Galaxy devices. While it offers voice commands and smart features, not everyone finds it useful. If you’re looking to disable Bixby, this guide provides step-by-step instructions for various methods.

    1. Remap the Side Button to Disable Bixby Activation

    On newer Samsung phones, the Side button (formerly the Bixby button) can be customized. By default, pressing and holding this button activates Bixby. To change this:

    1. Open Settings.
    2. Tap Advanced features.
    3. Select Side button.
    4. Under Press and hold, choose Power off menu.

    Now, holding the Side button will bring up the power menu instead of launching Bixby.

    1. Turn Off Bixby Voice Wake-Up

    Bixby Voice allows hands-free activation by saying “Hi, Bixby.” To disable this feature:

    1. Open Settings.
    2. Tap Advanced features.
    3. Select Bixby.
    4. Tap Voice wake-up.
    5. Toggle off the Voice wake-up switch.

    This prevents Bixby from activating through voice commands.

    1. Disable Bixby Home (Samsung Free) from the Home Screen

    Bixby Home, now known as Samsung Free, appears on the leftmost home screen panel. To remove it:

    1. Long-press on an empty area of the home screen.
    2. Swipe right to the Samsung Free panel.
    3. Toggle off the switch at the top of the screen.

    This removes the Bixby Home panel from your home screen.

    1. Disable Bixby Voice Completely

    To turn off Bixby Voice entirely:

    1. Open the Bixby app.
    2. Tap the Menu icon (three vertical dots) in the top right corner.
    3. Select Settings.
    4. Toggle off Bixby Voice.

    This prevents Bixby Voice from launching via any method.

    1. Leave Bixby (Remove Bixby Data)

    If you prefer to remove your Bixby data:

    1. Open Settings.
    2. Tap Advanced features.
    3. Select Bixby.
    4. Tap Leave Bixby.
    5. Confirm by tapping Leave Bixby again.
    6. Enter your Samsung account credentials if prompted.

    This action deletes your Bixby data and settings.

    1. Use ADB to Disable Bixby (Advanced Users)

    For advanced users comfortable with ADB (Android Debug Bridge), you can disable Bixby packages:

    1. Connect your phone to a computer with ADB installed.
    2. Open a command prompt or terminal window.
    3. Run the following commands:

    pgsql

    CopyEdit

    adb shell pm disable-user –user 0 com.samsung.android.bixby.agent

    adb shell pm disable-user –user 0 com.samsung.android.bixby.wakeup

    adb shell pm disable-user –user 0 com.samsung.android.bixby.service

    adb shell pm disable-user –user 0 com.samsung.android.bixby.voiceinput

    adb shell pm disable-user –user 0 com.samsung.android.bixby.plmsync

    adb shell pm disable-user –user 0 com.samsung.android.bixbyvision.framework

    This method disables Bixby components without rooting your device.

    Conclusion

    Disabling Bixby on your Samsung device can enhance your user experience if you prefer not to use the assistant. Whether by remapping buttons, turning off voice activation, or using advanced methods, you have control over Bixby’s presence on your phone.

  • How to Use Split Screen on Samsung Galaxy

    How to Use Split Screen on Samsung Galaxy

    Multitasking has become an integral part of our daily smartphone usage. Samsung Galaxy devices offer a split screen feature, allowing users to run two apps simultaneously. This guide provides a comprehensive, step-by-step tutorial on how to utilize the split screen functionality on Samsung Galaxy phones.

    What Is Split Screen Mode?

    Split screen mode, also known as Multitasking has become an integral part of our daily smartphone usage. Samsung Galaxy devices offer a split screen feature, allowing users to run two apps simultaneously. This guide provides a comprehensive, step-by-step tutorial on how to utilize the split screen functionality on Samsung Galaxy phones.

    What Is Split Screen Mode?

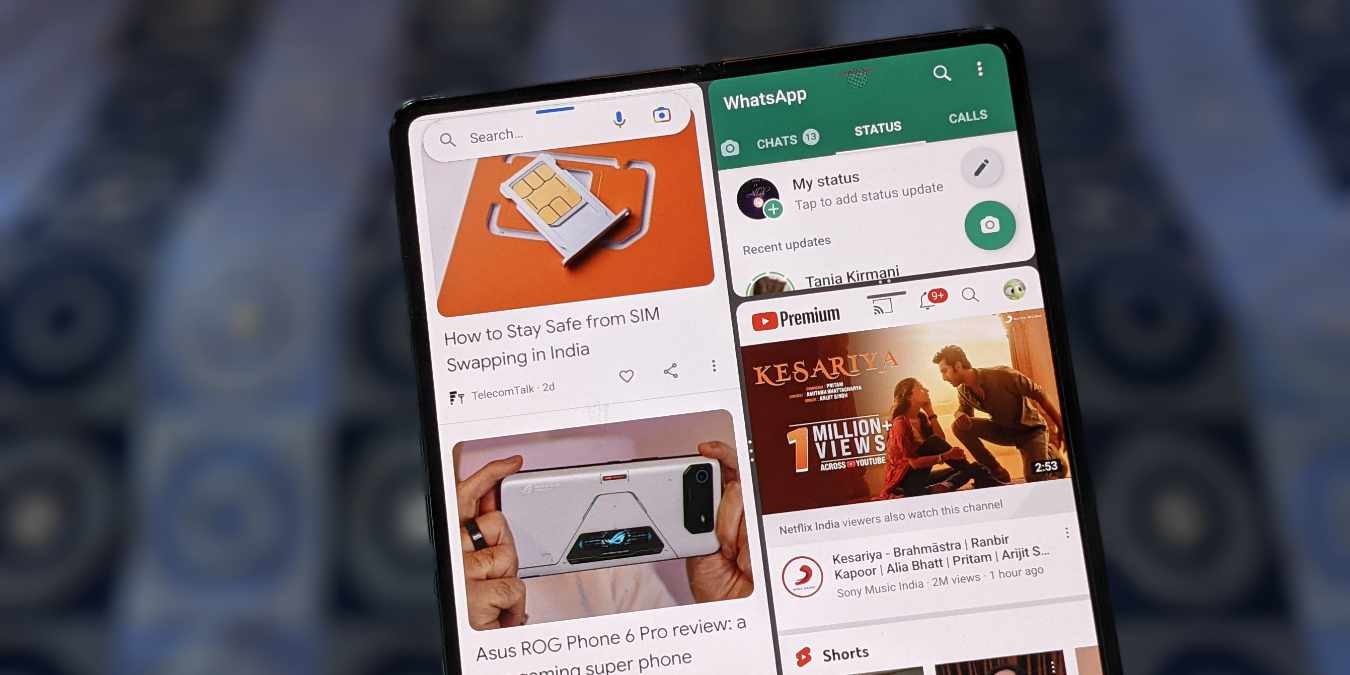
    Split screen mode, also known as Multi Window, enables you to view and interact with two apps at the same time. For instance, you can browse the web while watching a video or take notes during a video call. This feature enhances productivity by reducing the need to switch between apps.

    How to Use Split Screen on Samsung Galaxy

    Method 1: Using the Recent Apps Button

    1. Open the First App: Launch the first app you want to use.
    2. Access Recent Apps: Tap the Recent Apps button (usually the three vertical lines at the bottom of the screen) to view your recently used apps.
    3. Select Split Screen Option: Tap the app’s icon at the top of its preview window. A menu will appear; select Open in split screen view.
    4. Choose the Second App: Your first app will occupy the top half of the screen. From the list of recent apps or the app drawer, select the second app you wish to open.
    5. Adjust the Divider: A divider will appear between the two apps. Drag it up or down to resize the apps as needed.

    Method 2: Using the Edge Panel

    If your device supports the Edge Panel feature:

    1. Enable Edge Panel: Go to Settings > Display > Edge Screen > Edge Panels and toggle it on.
    2. Access Edge Panel: Swipe from the edge of the screen to open the Edge Panel.
    3. Select Apps: Tap and hold the app you want to use, then drag it to the top or bottom of the screen.
    4. Choose the Second App: Repeat the process for the second app, placing it in the remaining half of the screen.

    Method 3: Creating App Pairs

    For frequently used app combinations:

    1. Open Both Apps in Split Screen: Use either of the methods above to open two apps in split screen.
    2. Save as App Pair: Tap the divider between the apps, then tap the App Pair icon (usually a star or plus sign).
    3. Access App Pair: The App Pair will be saved in your Edge Panel for quick access in the future.

    Additional Tips

    • Exiting Split Screen: Drag the divider all the way up or down to close one of the apps and exit split screen mode.
    • Not All Apps Support Split Screen: Some apps may not be compatible with split screen mode.
    • Using Pop-Up View: For more flexibility, you can use the Pop-Up View to open apps in resizable windows. Access this by tapping the app icon in the Recent Apps view and selecting Open in pop-up view.

    Conclusion

    The split screen feature on Samsung Galaxy devices is a powerful tool for multitasking. By following the methods outlined above, you can efficiently use two apps simultaneously, enhancing your productivity and user experience.

  • How to Update Software on Samsung Galaxy

    How to Update Software on Samsung Galaxy

    Keeping your Samsung Galaxy device updated ensures optimal performance, enhanced security, and access to the latest features. This comprehensive guide walks you through the process of updating your device’s software, whether automatically, manually, or using Samsung’s Smart Switch.

    Why Software Updates Matter

    Regular software updates:

    • Enhance Security: Protect your device against vulnerabilities.
    • Improve Performance: Fix bugs and optimize system operations.
    • Introduce New Features: Access the latest functionalities and user interface improvements.

    Preparing for the Update

    Before initiating an update:

    1. Charge Your Device: Ensure your battery is at least 50% charged.
    2. Connect to Wi-Fi: Use a stable Wi-Fi connection to avoid data charges and ensure a smooth download.
    3. Free Up Storage: Make sure there’s sufficient storage space; updates can be several gigabytes in size.
    4. Backup Your Data: Although updates typically don’t affect personal data, it’s prudent to back up important information.

    Method 1: Updating via Device Settings

    1. Open Settings: Tap the Settings icon on your home screen or app drawer.
    2. Navigate to Software Update: Scroll down and select Software update or System updates.
    3. Check for Updates: Tap Download and install. Your device will search for available updates.
    4. Download the Update: If an update is available, follow the on-screen instructions to download it.
    5. Install the Update: Once downloaded, tap Install now. Your device will restart and begin the installation process.

    Note: Some updates may offer options to schedule the installation during off-peak hours.

    Method 2: Using Samsung Smart Switch

    Samsung’s Smart Switch allows you to update your device via a computer.

    1. Download Smart Switch: Install Smart Switch on your PC or Mac from
    2. Connect Your Device: Use a USB cable to connect your Samsung Galaxy device to your computer.
    3. Launch Smart Switch: Open the Smart Switch application on your computer.
    4. Check for Updates: If an update is available, Smart Switch will prompt you.
    5. Update Your Device: Follow the on-screen instructions to download and install the update.

    Note: Ensure your device remains connected during the entire process.

    Method 3: Manual Update via Firmware

    For advanced users, manually updating using official firmware is an option. This method is more complex and carries risks if not done correctly.

    1. Download Firmware: Obtain the official firmware for your specific device model from a trusted source.
    2. Use Odin Tool: Utilize the Odin software on your PC to flash the firmware onto your device.
    3. Follow Instructions Carefully: Adhere strictly to the flashing instructions to avoid potential issues.

    Warning: Incorrectly flashing firmware can lead to device malfunctions. Proceed only if you’re confident in the process.

    Troubleshooting Common Issues

    • Update Not Available: Updates roll out in phases. If not immediately available, check again later.
    • Insufficient Storage: Free up space by deleting unnecessary files or apps.
    • Battery Too Low: Charge your device to at least 50% before attempting an update.
    • Update Fails to Install: Restart your device and try again. If issues persist, consider using Smart Switch or seeking professional assistance.

    Post-Update Tips

    • Explore New Features: Familiarize yourself with any new functionalities introduced.
    • Check App Compatibility: Ensure your apps are updated to work seamlessly with the new software version.
    • Monitor Device Performance: Observe your device’s behavior post-update and report any anomalies to Samsung support.

    Final Thoughts

    Regularly updating your Samsung Galaxy device is crucial for security, performance, and access to the latest features. By following the methods outlined above, you can ensure your device remains up-to-date and functions optimally.

  • How to Connect Your Samsung TV to Alexa

    How to Connect Your Samsung TV to Alexa

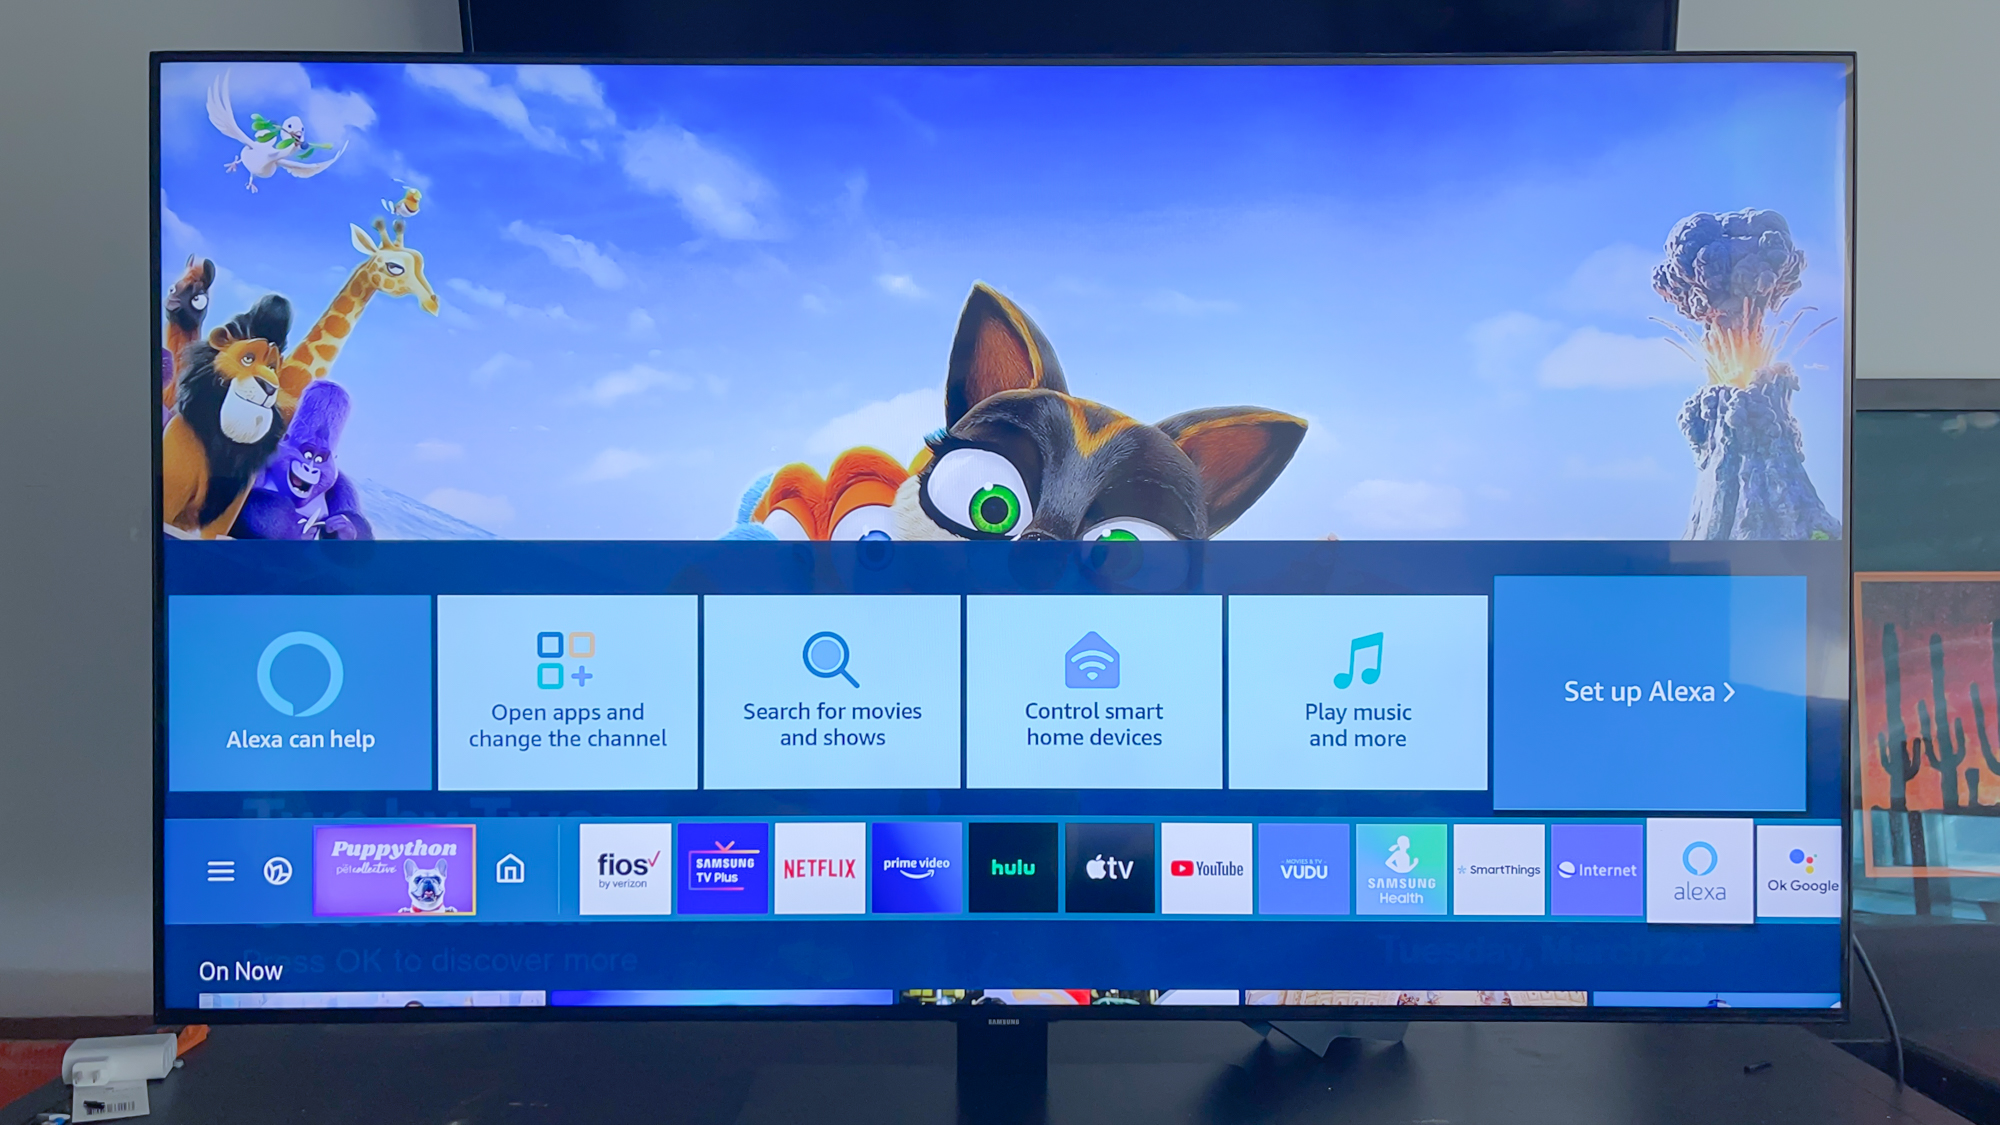
    Connecting your Samsung TV to Amazon Alexa allows for hands-free control over your entertainment experience. Whether you’re turning the TV on or off, adjusting the volume, or launching apps, Alexa can make it more convenient. Here’s a step-by-step guide to help you set it up.

    What You’ll Need

    • A Samsung Smart TV (2018 model or newer)
    • A Samsung Account
    • A Wi-Fi connection (same network for all devices)
    • The Samsung SmartThings app (iOS or Android)
    • The Amazon Alexa app (iOS or Android)
    • An Alexa-enabled device (e.g., Echo Dot) or a TV with built-in Alexa

     Step-by-Step: How to Connect Samsung TV to Alexa

    Step 1: Set Up Your Samsung TV

    1. Turn on your Samsung TV.
    2. Ensure it’s connected to the internet.
    3. Sign in to your Samsung Account on the TV.

    Note: If you don’t have a Samsung Account, you can create one at

    Step 2: Install and Configure SmartThings App

    1. Download the SmartThings app from the App Store or Google Play Store.
    2. Open the app and sign in with your Samsung Account.
    3. Tap the ‘+’ icon to add a device.
    4. Select ‘TV’ and follow the on-screen instructions to add your Samsung TV.

    Ensure your smartphone and TV are on the same Wi-Fi network.

    Step 3: Install and Configure Amazon Alexa App

    1. Download the Amazon Alexa app from the App Store or Google Play Store.
    2. Open the app and sign in with your Amazon Account.
    3. Tap the ‘Devices’ icon at the bottom.
    4. Tap ‘Your Smart Home Skills’ and then ‘Enable Smart Home Skills’.
    5. Search for ‘SmartThings’ and tap ‘Enable to Use’.
    6. Sign in with your Samsung Account to link SmartThings with Alexa.

    Step 4: Discover Devices in Alexa App

    1. After linking, Alexa will prompt you to discover devices.
    2. Tap Discover Devices’.
    3. Wait for Alexa to find your Samsung TV.
    4. Once discovered, tap ‘Set Up Device’ and assign it to a group if desired.

    ️ Using Alexa with Your Samsung TV

    Once set up, you can control your TV using voice commands:

    • “Alexa, turn on the TV.”
    • “Alexa, turn off the TV.”
    • “Alexa, volume up on the TV.”
    • “Alexa, mute the TV.”
    • “Alexa, switch to HDMI 1 on the TV.”
    • “Alexa, open Netflix on the TV.”

    Note: Some commands may vary depending on your TV model and region.

    Troubleshooting Tips

    • TV Not Found in SmartThings App: Ensure your TV is compatible and connected to the same Wi-Fi network as your smartphone.
    • Alexa Can’t Control TV: Verify that the SmartThings skill is enabled in the Alexa app and that devices have been discovered.
    • Voice Commands Not Working: Ensure your Alexa-enabled device is functioning properly and that the TV is powered on.

    Alternative Methods for Older Samsung TVs

    If your Samsung TV is an older model and not compatible with SmartThings:

    • Use a Logitech Harmony Hub: This device can bridge the gap between older TVs and Alexa.
    • Connect via HDMI-CEC: If your TV supports HDMI-CEC, you can control it using Alexa-enabled devices like the Amazon Fire TV Cube.

    Note: Functionality may be limited with these methods.

    Final Thoughts

    Connecting your Samsung TV to Alexa enhances your viewing experience by allowing hands-free control. By following the steps above, you can easily integrate your TV into your smart home ecosystem.

  • How to Reset Samsung Galaxy Phone Without Losing Data

    How to Reset Samsung Galaxy Phone Without Losing Data

    Is your Samsung Galaxy phone acting up in April 2025? Maybe an app is glitching, your network connection is unstable, or certain settings are causing unexpected behavior. Before you consider a factory reset, which erases all your personal data, there are several ways to reset your Samsung Galaxy phone without losing your precious photos, messages, apps, and other information. I’ve guided many Samsung users through these less drastic reset options, and this guide will walk you through each step to help you troubleshoot and refresh your device while keeping your data safe, especially for users in Delhi, India, where reliable internet for full backups might sometimes be a concern.

    Step 1: The Gentle Restart – Your First Line of Defense

    Often, a simple restart can resolve minor software hiccups and get your Samsung Galaxy phone back to normal without affecting your data.

    1. Restart Your Samsung Phone: Press and hold the Power button (usually located on the right side) and the Volume Down button simultaneously for a few seconds.
    2. Tap “Restart”: When the power menu appears, tap on “Restart.” Your phone will power down and then turn back on.

    Step 2: The More Forceful Restart – When Things Get Stubborn 

    If a regular restart doesn’t do the trick, a force restart can sometimes clear more persistent temporary issues without erasing your data. Use the same button combination as mentioned in Step 1 (Power button + Volume Down) and hold it for about 7-10 seconds until your phone restarts.

    Step 3: Resetting Network Settings – For Connectivity Issues

    If you’re experiencing problems with Wi-Fi, cellular data, or Bluetooth connections on your Samsung Galaxy phone, resetting your network settings can often resolve the issue without touching your personal data. This can be particularly useful for users in Delhi, India, dealing with varying network conditions.

    1. Open the Settings App: Locate and tap the Settings app icon.
    2. Tap on “General management”: Scroll down and tap on “General management.”
    3. Tap “Reset”: Tap on “Reset.”
    4. Tap “Reset network settings”: Choose “Reset network settings.” You’ll be prompted to confirm your action. Tap “Reset settings” again.

    Important Note: This will erase all your saved Wi-Fi passwords, paired Bluetooth devices, and cellular settings. You’ll need to re-enter your Wi-Fi passwords and re-pair your Bluetooth devices afterward.

    Step 4: Resetting App Preferences – For Misbehaving Apps 

    If specific apps are acting up or you’ve changed default app settings and want to revert them without a full reset, you can reset app preferences. This action will not delete your app data.

    1. Open the Settings App: Locate and tap the Settings app icon.
    2. Tap on “Apps”: Scroll down and tap on “Apps.”
    3. Tap the Three Dots (Menu): In the top-right corner, tap the three dots (menu icon).
    4. Tap “Reset app preferences”: Choose “Reset app preferences.” You’ll see a warning about what will be reset. Tap “Reset” to confirm. This will reset disabled apps, notification restrictions, default apps, and background data restrictions for all apps.

    Step 5: Resetting Accessibility Settings – If You’re Having Trouble with Accessibility Features 

    If you’ve accidentally enabled accessibility features that are causing issues, you can reset them without affecting your personal data.

    1. Open the Settings App: Locate and tap the Settings app icon.
    2. Tap on “Accessibility”: Scroll down and tap on “Accessibility.”
    3. Tap the Three Dots (Menu): In the top-right corner, tap the three dots (menu icon).
    4. Tap “Reset settings”: Choose “Reset settings.” Confirm your action by tapping “Reset.” This will revert all your accessibility settings to their defaults.

    Step 6: Resetting All Settings – A More Comprehensive Software Refresh 

    If you’re experiencing multiple software-related issues and the more specific resets haven’t helped, you can try resetting all settings on your Samsung Galaxy phone. This will reset all your personalized settings to their default values, including network settings, display settings, sound settings, and more, but it will not erase your personal data like photos, messages, and apps. This can be a good option for users in Delhi, India, who might have customized many settings over time and want a clean slate without losing their files.

    1. Open the Settings App: Locate and tap the Settings app icon.
    2. Tap on “General management”: Scroll down and tap on “General management.”
    3. Tap “Reset”: Tap on “Reset.”
    4. Tap “Reset all settings”: Choose “Reset all settings.” You’ll be prompted to confirm your action. Tap “Reset” again.

    Important Note: Be aware that this will reset many of your personalized settings, so you’ll need to reconfigure them afterward. However, your data will remain safe.

    My Personal Insights on Resetting Your Samsung Galaxy Phone 

    I’ve found that for most common Samsung Galaxy phone issues, one of the less drastic reset options outlined above will often do the trick without the need for a full data-erasing factory reset. Starting with a simple restart and then progressing to more specific resets like network settings or app preferences can often resolve the problem. Remember to carefully consider which reset option best fits the issue you’re experiencing. For users in Delhi, India, where internet data might be a consideration, these targeted resets can be preferable to a full reset requiring large downloads for app reinstalls.

  • How to Use Samsung Smart Switch to Transfer Data

    How to Use Samsung Smart Switch to Transfer Data

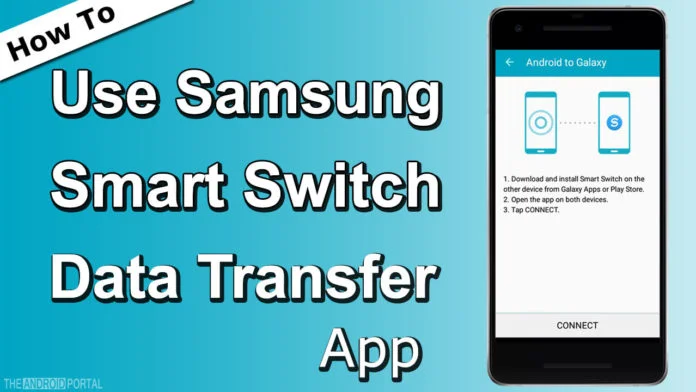
    Transferring everything from your old phone to a new one can feel daunting. Pictures, contacts, messages, apps – it’s a lot! Luckily, if you’re moving to a Samsung Galaxy device, Samsung offers a great tool called Smart Switch. I’ve used it myself countless times when switching phones, and it really simplifies the process. It lets you move your data seamlessly, whether you’re coming from another Samsung, a different Android phone, or even an iPhone.

    Smart Switch offers a few ways to transfer data: wirelessly, with a cable, or by using the Smart Switch software on your computer to create a backup and restore it later. I’ll walk you through each method.

    Before you start, make sure both phones are well-charged. It’s also a good idea to have enough free space on your new phone to receive all the data.

    Method 1: Transferring Data Wirelessly (Phone to Phone)

    This is often the easiest method if both phones support it. You’ll need both devices nearby.

    1. Open Smart Switch on your new Samsung phone. Smart Switch is usually pre-installed on new Galaxy devices. If not, you can download it from the Google Play Store or Samsung Galaxy Store.
    2. On the old phone (Android or iPhone), you’ll also need the Smart Switch Mobile app. Download and install it if you don’t have it.
    3. Launch the Smart Switch app on both phones.
    4. On your new Samsung phone, select ‘Receive data’.
    5. Choose your old phone’s operating system: ‘Galaxy/Android’ or ‘iPhone/iPad’.
    6. Select ‘Wireless’ as the transfer method.
    7. On your old phone, select ‘Send data’.
    8. Choose ‘Wireless’.
    9. The phones will attempt to connect. Place them close together. Once connected, you’ll see a list of data types you can transfer (Contacts, Messages, Call logs, Apps, Pictures, Videos, Audio, Documents, Settings, Home screen layout, etc.).
    10. Select the data you want to transfer. I usually select everything the first time. You can always go back and transfer more later if needed.
    11. Tap ‘Transfer’.
    12. The transfer will begin. This can take anywhere from a few minutes to over an hour, depending on how much data you have. Keep the apps open on both phones and try not to use them during the process.
    13. Once finished, both phones will confirm the transfer is complete.

    My Experience: Wireless is great for convenience, but sometimes a large transfer can be interrupted. Make sure your Wi-Fi is stable or the phones are very close.

    Method 2: Transferring Data Using a Cable (Phone to Phone)

    Using a cable is generally faster and more reliable than wireless, especially for large amounts of data. You’ll need a USB cable that connects both phones and a USB-C connector (OTG adapter). New Samsung phones often come with one in the box.

    1. Open Smart Switch on your new Samsung phone.
    2. On the old phone (Android or iPhone), download and open the Smart Switch Mobile app.
    3. On your new Samsung phone, select ‘Receive data’.
    4. Choose your old phone’s operating system: ‘Galaxy/Android’ or ‘iPhone/iPad’.
    5. Select ‘Cable’ as the transfer method.
    6. Connect the two phones using the USB cable and the USB-C connector. Plug the USB-C connector into the new Samsung phone, and then connect the cable from the old phone to the other end of the connector.
    7. On your old phone, you might be asked to allow access to data. Tap ‘Allow’.
    8. The new phone will scan your old phone for data.
    9. Select the data you want to transfer from the list provided.
    10. Tap ‘Transfer’.
    11. The data will start transferring via the cable. This is usually much quicker than wireless.
    12. Wait for the transfer to complete on both devices.

    My Experience: This is my preferred method when moving from Android to Android. It’s fast and rarely drops the connection. Just remember to have the right cable and adapter!

    Method 3: Transferring Data Using Smart Switch on a PC or Mac

    This method is useful for creating a full backup of your old phone on your computer, which you can then restore to your new phone. It’s also the primary method recommended when moving data from an iPhone to a Samsung via computer.

    1. Download and install Smart Switch on your PC or Mac. Go to the official Samsung Smart Switch website to get the latest version.
    2. Launch the Smart Switch computer program.
    3. Connect your old phone to your computer using a USB cable.
    4. In the Smart Switch program, select ‘Backup’.
    5. Wait for the program to back up your phone’s data to your computer. This can take some time depending on how much data you have. Once complete, disconnect your old phone.
    6. Now, connect your new Samsung phone to the computer using a USB cable.
    7. If this is the first time connecting, you might need to allow the connection on your new phone.
    8. In the Smart Switch program, select ‘Restore’.
    9. Smart Switch should automatically detect the backup you just created. If not, you might need to select it.
    10. Choose the data you want to restore from the backup.
    11. Click ‘Restore now’.
    12. The program will transfer the data from the backup file on your computer to your new phone.
    13. Once the restore is finished, you can disconnect your new phone.

    My Experience: I’ve used the PC backup method when troubleshooting issues or when transferring from an iPhone where a direct cable connection wasn’t working perfectly. It’s a solid option for having a local copy of your data.

    Transferring from iPhone/iPad

    Smart Switch is designed to help iPhone users switch to Galaxy as well.

    • Wireless: You can use the wireless method (Method 1). On the new Samsung, select ‘Receive data’ > ‘iPhone/iPad’. On the iPhone, open the Smart Switch app (download from the App Store), select ‘Send data’ > ‘Wireless’. The apps will guide you through connecting. You might need to sign into your iCloud account to transfer some data types.
    • Cable: You can use the cable method (Method 2) with the iPhone’s lightning cable connected to the USB-C connector on the new Samsung phone. Follow the steps for Method 2, selecting ‘iPhone/iPad’ as the old phone type.
    • PC/Mac: This is often the most comprehensive way from iPhone. Back up your iPhone to your computer using iTunes/Finder. Then, connect your new Samsung to the Smart Switch PC/Mac software and choose ‘Restore’. Smart Switch can pull data directly from your iTunes/Finder backup file.

    My Experience: Moving from iPhone to Android can sometimes be trickier with certain data types (like iMessages), but Smart Switch does a good job with contacts, photos, videos, and calendar events. The PC/Mac method accessing the iTunes backup seems to grab the most data effectively.

    What Data Can Smart Switch Transfer?

    Smart Switch can transfer a wide range of data, including:

    • Contacts
    • Messages (SMS, MMS)
    • Call history
    • Photos and videos
    • Music and audio files
    • Documents and files
    • Calendar events
    • Apps (transfers compatible apps or finds them on the Play Store)
    • Home screen layout and wallpapers
    • Alarm settings
    • Wi-Fi settings
    • Accessibility settings
    • Other preferences and settings

    Keep in mind that some data, like app login information or data within certain apps, might not transfer directly. You may need to log back into apps or set them up again. Encrypted data might also require extra steps.

    Troubleshooting Common Issues

    • Slow Transfer: Try the cable method. Ensure phones are close for wireless transfer. Close unnecessary apps on both phones.
    • Connection Issues: Restart both phones. Ensure the Smart Switch app is open on both devices. Check cable and connector connections if using wired.
    • Not Enough Space: Check the storage on your new phone. Delete unnecessary files or choose to transfer less data.
    • Certain Data Not Transferring: Some app data or secure content may not transfer. You might need to transfer manually or use in-app backup options.

    Using Samsung Smart Switch makes moving to a new Galaxy phone much less stressful. It’s a reliable tool that saves you the hassle of manually moving your digital life piece by piece. Just choose the method that works best for you, follow the steps, and you’ll be up and running on your new phone with all your familiar data in no time.