Category: Tech

  • How to Check Samsung Warranty Online

    How to Check Samsung Warranty Online

    If you’ve purchased a Samsung device in India and want to verify its warranty status, there are several reliable methods to do so. This guide provides clear, step-by-step instructions to help you check your Samsung product’s warranty online.

    Method 1: Check Warranty via Samsung India’s Official Website

    Samsung offers an official warranty checker for Indian customers.

    Steps:

    1. Visit the Samsung India Warranty Page:
      Go to Samsung India’s Warranty Checker.
    2. Enter Your Device Details:
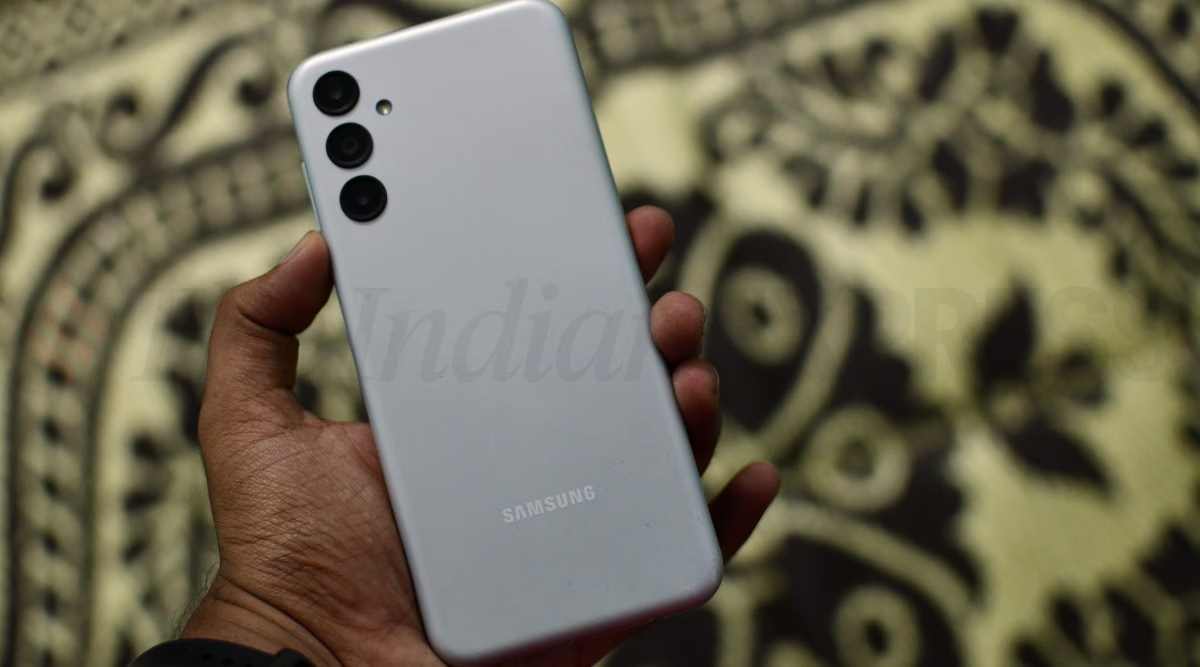
      • IMEI Number: For mobile devices, dial *#06# on your phone to retrieve the 15-digit IMEI number.
      • Serial Number: For other products, locate the serial number on the product label or packaging.Reddit+4UnlockBoot+4IMEI24.com+4
    3. Submit the Information:
      After entering the required details, click on the “Check Warranty” button.
    4. View Warranty Status:
      The website will display your product’s warranty status, including the expiration date and coverage details.

    Method 2: Use the Samsung Members App

    The Samsung Members app provides personalized support and warranty information.Samsung+4Samsung+4Samsung+4

    Steps:

    1. Download the App:
      Install the Samsung Members app from the Google Play Store.
    2. Sign In:
      Log in with your Samsung account credentials.
    3. Access Support:
      • Open the app and navigate to the “Support” section.
      • Select your registered device.Samsung+1Reddit+1Samsung
    4. Check Warranty:
      Under your device details, you’ll find the warranty status and expiration date.

    Method 3: Register and Check via Samsung Account

    Registering your product with your Samsung account allows you to manage warranty and service requests.Samsung+6Samsung+6Samsung+6

    Steps:

    1. Visit Samsung Account Page:
      Go to Samsung Account – My Products.
    2. Sign In:
      Enter your Samsung account credentials.
    3. Register Your Product:
      • Click on “Register Product.”
      • Enter the required details, such as model number and serial number.
    4. View Warranty Information:
      Once registered, your product will appear under “My Products,” displaying warranty status and support options.

    Method 4: Use Third-Party IMEI Checkers

    Several third-party websites offer free IMEI-based warranty checks. While not official, they can provide additional information.

    Popular Options:

    • IMEI24: Visit IMEI24 Samsung Warranty Check and enter your IMEI number.IMEI.info+2IMEI24.com+2UnlockBoot+2
    • UnlockBoot: Go to UnlockBoot Samsung IMEI Checker and input your IMEI to get warranty details.UnlockBoot+1Reddit+1

    Note: These tools can provide information like purchase date, warranty status, and device specifications.UnlockBoot

    Tips for Accurate Warranty Information

    • Keep Proof of Purchase: Always retain your purchase receipt or invoice. It’s essential for warranty claims.Reddit+9Samsung+9Samsung+9
    • Register Early: Register your product soon after purchase to ensure accurate warranty tracking.
    • Check Regularly: Periodically check your warranty status, especially before the expiration date, to address any issues in time.
  • How to Backup Samsung Phone to Google Drive

    How to Backup Samsung Phone to Google Drive

    Losing your phone data can be a nightmare. Photos, contacts, messages – poof, gone. It happened to a friend of mine years ago after their phone took an unexpected swim. They lost years of memories. That’s when I realized just how important backing up your phone is.

    For Samsung phone users, Google Drive offers a simple and reliable way to keep your important information safe in the cloud. It’s integrated right into your phone’s settings. This guide will walk you through setting it up.

    What Gets Backed Up to Google Drive?

    It’s important to understand what the standard Google Drive backup on your Samsung phone covers. This backup typically includes:

    • App data: Data from many of your apps (progress in games, app settings).
    • Call history: Your list of incoming, outgoing, and missed calls.
    • Contacts: Saved contact information (though these are often synced separately via your Google Account anyway).
    • Device settings: Things like Wi-Fi passwords, display settings, brightness preferences.
    • SMS messages: Your text message conversations.

    What about Photos and Videos? While your Google Drive storage is used, photos and videos are primarily handled by the Google Photos app, which has its own backup system. We’ll cover that too, as it’s essential for a complete backup.

    Step-by-Step: Setting Up Google Drive System Backup

    This is where you tell your phone to back up its core data and settings.

    1. Open Settings: Find the Settings app icon on your home screen or in your app drawer. Tap it to open your phone’s settings menu.
    2. Find Backup Options: Scroll down the Settings menu. Look for an option related to accounts, backup, or Google. It might be called Accounts and backup, Google, or simply System. Tap on it. On newer Samsung phones, Accounts and backup is a common path.
    3. Navigate to Google Backup: Within the backup section, you should see an option specifically for Google. Tap on Google or Backup (under the Google section).
    4. Check “Back up to Google Drive”: You will see a setting labeled Back up to Google Drive. Make sure the toggle switch next to this is turned On. If it’s off, tap it to enable it.
    5. Verify Your Account: Just below the toggle, you’ll see which Google Account your phone is using for backups. Make sure this is the correct account you want to use. If you have multiple Google accounts on your phone, tap on the account name to select the right one.
    6. See What’s Being Backed Up: The screen will show you what types of data are included in this backup (App data, SMS, Call history, Device settings).
    7. Check Last Backup: You’ll also see when the last backup occurred. If it says “Never backed up” or the date is old, you can initiate a manual backup.
    8. Initiate Manual Backup (Optional but Recommended): To back up immediately, look for a button like Back up now or Sync now. Tap it. Your phone will start backing up your data to your selected Google Drive account. Make sure you are connected to Wi-Fi and ideally, your phone is charging for the backup to complete smoothly, especially the first time.

    Your phone will now automatically back up this system data periodically, usually when connected to Wi-Fi and charging.

    Step-by-Step: Backing Up Photos and Videos with Google Photos

    Since photos and videos are precious, backing them up is often a priority. Google Photos makes this easy and uses your Google Drive storage quota.

    1. Open Google Photos: Find and open the Google Photos app on your phone.
    2. Go to Settings: Tap on your profile icon in the top right corner of the app. Then, tap on Photos settings.
    3. Select Backup & Sync: In the Photos settings menu, tap on Backup & sync.
    4. Toggle Backup & Sync On: Make sure the toggle switch for Backup & sync is turned On.
    5. Choose Account and Settings:
      • Account: Verify that the correct Google Account is selected for the backup.
      • Upload size: Decide between “Original quality” (uses more storage but no compression) or “Storage saver” (uses less storage with slight compression). Choose based on your storage plan and preference.
      • Mobile data usage: You can choose if you want photos/videos to back up over mobile data or only on Wi-Fi. To save data, select “Daily limit for backing up videos” and set it to “No data” or a low limit, ensuring photos back up mostly on Wi-Fi. I always set mine to Wi-Fi only to avoid unexpected data charges.
      • Back up device folders: If you have photos in folders other than your main camera roll (like screenshots, downloaded images), tap this option and select which folders you want to include in the backup.
    6. Monitor Backup Progress: Go back to the main Google Photos screen. You’ll usually see a status at the top telling you if it’s backing up or if backup is complete. Ensure you’re on Wi-Fi to facilitate the backup.

    With both the system backup and Google Photos backup enabled, your Samsung phone’s essential data and media are being saved to your Google account storage.

    Important Tips and Troubleshooting

    • Storage Space: Google accounts come with 15GB of free storage shared across Drive, Gmail, and Photos. If you have a lot of data, especially photos/videos, you might need to purchase more storage (Google One). Check your storage usage in Google Drive or Google Photos settings.
    • Wi-Fi Connection: Automatic and manual backups work best, and sometimes only, when connected to a stable Wi-Fi network.
    • Charging: For automatic backups to trigger overnight, your phone often needs to be charging and connected to Wi-Fi.
    • Check Backup Status: Periodically check your phone’s backup settings and Google Photos to ensure backups are happening regularly.
    • Multiple Accounts: Make sure both the system backup and Google Photos are linked to the same Google Account you intend to use for restoration.
    • Selective Backup: The standard system backup is automatic. You can’t easily pick and choose which specific app data or settings to back up within the system settings, but you can manage photo folders in Google Photos.

    Restoring Your Data

    The beauty of backing up to Google Drive is the ease of restoration. When you set up a new Samsung phone or factory reset your current one, during the initial setup process, you’ll be prompted to copy data from a backup. Simply sign in with the same Google Account you used for the backup, and you’ll be able to restore your apps, call history, messages, settings, and Google Photos library.

    Setting up your Samsung phone to back up to Google Drive is a straightforward process that provides significant peace of mind. Take the few minutes to do it today, and protect your valuable data.

  • How to Enable Developer Mode on Samsung Galaxy A54

    How to Enable Developer Mode on Samsung Galaxy A54

    The Samsung Galaxy A54, a popular smartphone in India and globally in April 2025, offers a user-friendly experience with its intuitive One UI. However, hidden beneath the surface lies a treasure trove of advanced settings known as Developer Options. This menu, primarily intended for software developers, unlocks a range of powerful tools and customizations that can be useful for various purposes, from enabling USB debugging to tweaking animation speeds. If you’re curious to explore these advanced settings on your Samsung Galaxy A54, this guide will walk you through the simple, step-by-step process to enable Developer Options.

    Step 1: Accessing the Settings App (Your Starting Point)

    The journey to unlocking Developer Options begins within your phone’s main settings.

    1. Locate the Settings App: Find the Settings app icon on your home screen or in your app drawer. It usually looks like a gear or cogwheel. Tap on it to open the Settings menu.

    Step 2: Navigating to “About phone” (Finding Your Device Information)

    Developer Options is intentionally hidden within the “About phone” section, which contains essential details about your device’s software and hardware.

    1. Scroll Down to “About phone”: Once you are in the Settings menu, scroll down until you find the option labeled “About phone.” It’s usually near the bottom of the list. Tap on “About phone.”

    Step 3: Locating the “Software information” (The Key to Unlocking)

    On the “About phone” screen, you need to find the “Software information” option. This is where the “Build number,” which is the trigger for enabling Developer Options, is located on the Samsung Galaxy A54 in April 2025.

    1. Tap on “Software information”: Within the “About phone” menu, look for and tap on “Software information.”

    Step 4: Finding the “Build number” (The Secret Knock)

    The “Build number” is the specific entry you need to interact with to unlock Developer Options on your Samsung Galaxy A54.

    1. Locate “Build number”: On the “Software information” screen, scroll down until you find the entry labeled “Build number.”

    Step 5: Tapping Repeatedly to Unlock (The Magic Activation)

    This is the crucial step that activates the hidden Developer Options menu on your Samsung Galaxy A54.

    1. Tap the “Build number” Multiple Times: Rapidly tap on the “Build number” entry seven times in quick succession. You need to tap it fairly quickly for the system to recognize the action.
    2. Observe the Confirmation Message: After tapping the “Build number” seven times, you should see a small pop-up notification at the bottom of your screen indicating that “Developer mode has been turned on!” or “You are now a developer!” This confirms that you have successfully unlocked the hidden menu.

    Step 6: Accessing the Developer Options Menu (Exploring the Hidden Settings)

    Once unlocked, the Developer Options menu will appear in a different section of your Settings app on your Samsung Galaxy A54.

    1. Go Back to the Main Settings Menu: Navigate back to the main Settings menu where you initially found the “About phone” option.
    2. Look for “Developer options”: Scroll down the Settings menu. You should now see a new entry called “Developer options” located near the bottom of the list, usually above “About phone” or under “System” depending on your specific One UI version in April 2025. Tap on “Developer options” to access the hidden settings.

    Step 7: Using Developer Options (Proceed with Caution)

    You have now successfully unlocked and accessed the Developer Options menu on your Samsung Galaxy A54 in April 2025. This menu contains a wide range of advanced settings that can be used for various purposes, including:

    • USB Debugging: Allows your phone to communicate with your computer for development purposes.
    • OEM Unlocking: Necessary for unlocking the bootloader of your device.
    • Window Animation Scale, Transition Animation Scale, Animator Duration Scale: Adjusting these settings can make your phone feel faster or slower.
    • Force RTL layout direction: Useful for testing app layouts for right-to-left languages.
    • Stay awake: Prevents your screen from turning off while charging.
    • Mock locations: Allows you to set a fake GPS location for testing purposes.

    Important Note: Exercise caution when exploring and modifying settings within the Developer Options menu. Incorrectly changing some settings can potentially cause your phone to malfunction or behave unexpectedly. If you are unsure about what a particular setting does, it’s generally best to leave it at its default value unless you have a clear understanding of its function.

    Step 8: Disabling Developer Options (If Needed)

    If you no longer need access to Developer Options or want to hide the menu again on your Samsung Galaxy A54, you can easily disable it.

    1. Open the Settings App: Go to your phone’s main Settings menu.
    2. Look for “Developer options”: Scroll down and tap on “Developer options.”
    3. Toggle the “Developer options” Switch Off: At the very top of the Developer Options menu, you should see a toggle switch. Simply tap on this switch to turn it off. The Developer Options menu will now be hidden from the main Settings menu.

    My Personal Insights on Developer Options 

    Having explored the settings of numerous Android phones, including many Samsung Galaxy devices popular in India, I’ve found Developer Options to be a powerful tool for those who want more control over their device. Whether you’re a developer testing your applications or a user who likes to tinker with advanced settings, unlocking this menu on your Samsung Galaxy A54 in April 2025 is a simple process that opens up a world of possibilities. Just remember to proceed with caution and research any settings you’re unfamiliar with before making changes.

  • How to Connect Samsung Phone to TV via Bluetooth

    How to Connect Samsung Phone to TV via Bluetooth

    Want to stream audio from your Samsung phone to your TV’s speakers or perhaps use a Bluetooth keyboard or mouse with your smart TV? Connecting your Samsung phone to your TV via Bluetooth offers a convenient way to enhance your home entertainment experience. While Bluetooth isn’t typically used for screen mirroring high-resolution video content (for that, you’d usually use Wi-Fi Direct or casting), it’s excellent for audio and controlling your TV with peripherals. I’ve often used this feature to listen to music or podcasts through my TV’s sound system, and it’s a breeze to set up. This guide will walk you through the step-by-step process of connecting your Samsung phone to your TV using Bluetooth.

    Step 1: Prepare Your Samsung Phone and TV for Pairing

    Before you begin the connection process, ensure both your devices are ready.

    1. Turn On Bluetooth on Your Samsung Phone:
      • Swipe down from the top of your phone’s screen to open the Quick Settings panel.
      • Look for the Bluetooth icon. If it’s not already on, tap it to enable Bluetooth. You might need to tap and hold the icon to access the Bluetooth settings menu directly.
      • Alternatively, you can go to Settings > Connections > Bluetooth and toggle the switch to the “On” position.
    2. Ensure Your Samsung TV Has Bluetooth Capability: Most modern smart TVs, including Samsung models, come equipped with Bluetooth. However, it’s worth double-checking your TV’s specifications. You can usually find this information in your TV’s manual or on the manufacturer’s website.
    3. Put Your Samsung TV in Pairing Mode (If Necessary): Some TVs automatically become discoverable when you try to connect a Bluetooth device. However, others might require you to manually initiate pairing mode.
      • Navigate to your Samsung TV’s Settings menu. The exact path might vary depending on your TV model, but common locations include “Sound,” “Bluetooth,” “Connection,” or “External Device Manager.”
      • Look for an option like “Bluetooth Device List,” “Pair new device,” or “Add Bluetooth device.” Select this option. Your TV will then start scanning for nearby Bluetooth devices or enter pairing mode.

    Step 2: Initiate the Bluetooth Connection from Your Samsung Phone

    With both devices ready, you can now initiate the pairing process from your phone.

    1. Open Bluetooth Settings on Your Samsung Phone: If you’re not already there, go to Settings > Connections > Bluetooth.
    2. Scan for Available Devices: Your phone will automatically start scanning for nearby Bluetooth devices. If it doesn’t, there might be a “Scan” button you need to tap.
    3. Locate Your Samsung TV in the List: Once your TV enters pairing mode or becomes discoverable, it should appear in the list of available devices on your phone. The name might include your TV model number or a custom name you’ve assigned.
    4. Tap on Your Samsung TV’s Name: Select your TV from the list to initiate the pairing process.
    5. Confirm Pairing (If Prompted): You might see a pairing request on your phone and/or your TV screen. Confirm the pairing by tapping “Pair” or “OK” on both devices if required. You might also be asked to enter a PIN or passcode. If so, follow the on-screen instructions. The default PIN is often “0000” or “1234,” but your TV might display the correct PIN on the screen.

    Step 3: Understanding Bluetooth Functionality Between Your Phone and TV

    Once the pairing is successful, the functionality will depend on the capabilities of your specific Samsung phone and TV models. Here are some common uses:

    • Audio Output to TV Speakers: You can stream audio from apps on your phone (like music streaming services, podcasts, or audiobooks) to play through your TV’s speakers. This can be useful if your TV has a better sound system than your phone. To do this, after pairing, you might need to select your TV as the audio output device in your phone’s Bluetooth settings or within the specific app you are using.
    • Connecting Bluetooth Headphones to Your TV via Your Phone (Less Common): In some scenarios, your phone might act as an intermediary. You could potentially connect Bluetooth headphones to your phone, and the audio from your TV might be routed through your phone to the headphones. However, it’s often more direct to connect Bluetooth headphones directly to the Samsung TV if your TV supports it.
    • Using Bluetooth Peripherals with Your TV: Your Samsung phone can act as a bridge to connect Bluetooth keyboards or mice to your Samsung TV. For example, you might pair a Bluetooth keyboard with your phone, and then your phone communicates with the TV, allowing you to use the keyboard for typing in apps on the TV. This functionality can vary depending on the specific apps and devices.

    Important Note: Bluetooth is generally not the primary method for screen mirroring or streaming video content from your phone to your TV in high resolution. For that, you would typically use features like:

    • Smart View (Samsung): A Wi-Fi Direct-based screen mirroring feature available on many Samsung phones and TVs.
    • Screen Mirroring (Miracast): A standard for wireless display mirroring over Wi-Fi.
    • Casting (Chromecast built-in or Apple AirPlay): Streaming specific content from apps to your TV over your Wi-Fi network.

    Step 4: Managing and Disconnecting the Bluetooth Connection

    Once you’re done using the Bluetooth connection, you can manage or disconnect it.

    1. Disconnecting from Your Phone:
      • Go to Settings > Connections > Bluetooth.
      • Find your TV in the list of paired devices.
      • Tap the Settings icon (usually a gear icon) next to your TV’s name.
      • Select “Disconnect.”
    2. Unpairing/Forgetting the Device: If you don’t plan to use the Bluetooth connection with your TV frequently, you can unpair or forget the device. This will remove it from your list of saved Bluetooth connections. Follow the same steps as above for disconnecting, but look for an option like “Unpair” or “Forget.”
    3. Disconnecting from Your TV: You can also usually disconnect or unpair your phone from your TV’s Bluetooth device list within the TV’s settings menu.

    My Personal Experience with Samsung Phone to TV Bluetooth Connections

    I’ve primarily used Bluetooth to stream music from my Samsung phone to my TV’s soundbar when I wanted a richer audio experience than my phone’s speakers could provide. The initial pairing process was quick and easy, and once paired, my phone usually reconnects automatically when Bluetooth is enabled on both devices. I’ve also occasionally used a Bluetooth keyboard connected to my phone to navigate apps on my Samsung TV, which can be more convenient than using the TV remote for typing.

  • How to Transfer Data from Old Phone to New Samsung

    How to Transfer Data from Old Phone to New Samsung

    Upgrading to a new Samsung smartphone is an exciting experience, but transferring data from your old phone can be a daunting task. Whether you’re moving from another Samsung device, an Android phone, or even an iPhone, it’s essential to ensure that all your important files, contacts, apps, and messages make the transition seamlessly. In this guide, we’ll explain how to transfer data from old phone to new Samsung, using different methods suited to various devices and preferences.

    Why Transferring Data is Important

    Switching to a new phone without losing any essential data is crucial. Here are some reasons why transferring data properly matters:

    • Preserve Important Information – Keep contacts, messages, apps, and settings intact.
    • Save Time – Avoid reconfiguring settings and downloading everything manually.
    • Ensure a Smooth Transition – Continue using your phone as usual without disruption.

    Now, let’s dive into how to transfer data from old phone to new Samsung using different methods.


    Method 1: Using Samsung Smart Switch

    Samsung’s Smart Switch is the most efficient way to transfer data, whether you’re moving from an old Samsung phone, another Android device, or an iPhone.

    Step 1: Install Smart Switch

    1. Ensure that Samsung Smart Switch is installed on both devices.
    2. On Samsung devices, it is pre-installed, but you can download it from the Google Play Store or Galaxy Store if needed.

    Step 2: Choose a Transfer Method

    Smart Switch offers three main ways to transfer data:

    • Wireless Transfer – Direct phone-to-phone transfer without cables.
    • USB Cable Transfer – Faster and more stable, ideal for large files.
    • PC/Mac Transfer – Backup and restore via a computer.

    Step 3: Transfer Data Wirelessly (Recommended for Most Users)

    1. Open Smart Switch on both phones.
    2. Select Send Data on the old phone and Receive Data on the new Samsung phone.
    3. Choose Wireless and follow on-screen instructions.
    4. Select the types of data you want to transfer and tap Transfer.
    5. Wait for the process to complete.

    Step 4: Transfer Data Using a USB Cable

    1. Connect both phones using a USB-C to USB-C cable or a USB adapter.
    2. Open Smart Switch and select Cable Transfer.
    3. Follow the prompts to select and transfer data.

    Method 2: Using Google Backup (For Android Users)

    If you have been using Google services for backups, transferring data becomes easy.

    Step 1: Backup Data on Old Phone

    1. Go to Settings > Google > Backup on your old Android phone.
    2. Ensure Back up to Google Drive is enabled.
    3. Tap Back Up Now and wait for the backup to complete.

    Step 2: Restore Backup on New Samsung Phone

    1. Turn on your new Samsung phone and follow the setup instructions.
    2. When prompted, choose Restore from Google Backup.
    3. Sign in with the same Google account used for the backup.
    4. Wait for the restoration to complete.

    Method 3: Transfer Data from iPhone to Samsung

    If you’re switching from an iPhone to a Samsung device, Smart Switch still makes it easy.

    Step 1: Prepare Your iPhone

    1. Ensure iCloud Backup is up to date by going to Settings > [Your Name] > iCloud > iCloud Backup.
    2. If using a cable transfer, get a Lightning to USB-C adapter.

    Step 2: Transfer Data Using Smart Switch

    1. Open Smart Switch on your Samsung phone.
    2. Choose Receive Data and select iPhone/iPad.
    3. Sign in to iCloud or connect via cable.
    4. Select the data you wish to transfer (contacts, messages, photos, etc.).
    5. Start the transfer and wait for completion.

    Method 4: Transfer Using a MicroSD Card or USB Drive

    If your old phone has a microSD card slot or you have a USB drive with an adapter, this can be an easy way to transfer files.

    Step 1: Backup Data on Old Phone

    1. Insert a microSD card or USB drive into your old phone.
    2. Move important files (photos, documents, videos) to the external storage.

    Step 2: Restore Data on New Samsung Phone

    1. Insert the microSD card or USB drive into the new Samsung phone.
    2. Copy the backed-up files to the internal storage.

    Method 5: Transfer Data Using Bluetooth or Wi-Fi Direct

    If you only need to transfer small files like photos or contacts, Bluetooth or Wi-Fi Direct can be a quick solution.

    Step 1: Enable Bluetooth or Wi-Fi Direct

    1. Enable Bluetooth on both devices.
    2. Pair the two phones by going to Settings > Bluetooth.

    Step 2: Send Files

    1. Open the File Manager or Gallery app.
    2. Select the files you want to transfer.
    3. Tap Share > Bluetooth or Wi-Fi Direct and select the new Samsung phone.
    4. Accept the transfer on the new phone and wait for the files to be received.

    Additional Tips for a Smooth Data Transfer

    • Check Available Storage – Ensure your new Samsung phone has enough space for all transferred files.
    • Use a Stable Wi-Fi Connection – For cloud backups, a strong connection ensures a faster and smoother process.
    • Keep Both Devices Charged – Data transfer can take time, so ensure both phones have enough battery life.
    • Clear Unnecessary Files – Before transferring, delete old or unwanted data to save space.
    • Update Both Devices – Ensure that both phones have the latest software updates for compatibility.

    Final Thoughts

    Learning how to transfer data from old phone to new Samsung ensures that you don’t lose important files, messages, or settings when upgrading your device. Whether you use Samsung Smart Switch, Google Backup, iCloud, or other methods, the key is choosing the right transfer method based on your devices and preferences. By following this guide, you can seamlessly switch to your new Samsung phone and enjoy its features without any data loss.

  • How to Unlock a Samsung Phone Without a Password

    How to Unlock a Samsung Phone Without a Password

    Forgot your Samsung phone password? Don’t panic—you’re not alone. Many people find themselves locked out of their devices due to a forgotten PIN, pattern, or password. Thankfully, there are several methods to regain access to your phone without losing essential data. This blog will guide you through the steps on how to unlock a Samsung phone without a password using reliable techniques.

    Why You Might Need to Unlock a Samsung Phone Without a Password

    People often forget their phone passwords due to various reasons:

    1. Setting a new password and forgetting it shortly after.
    2. Children or friends accidentally locking the device.
    3. Entering the wrong password multiple times, resulting in a locked device.

    No matter the cause, the solutions below will help you unlock your Samsung phone quickly and safely.


    1. Using Samsung Find My Mobile

    Samsung provides a convenient service called “Find My Mobile” that allows users to remotely unlock their phones. This feature works if you’ve set up a Samsung account on the device before getting locked out.

    Steps:

    1. Visit the Samsung Find My Mobile website on a computer or another phone.
    2. Log in with the same Samsung account credentials used on the locked phone.
    3. Once logged in, locate your device on the dashboard.
    4. Select the “Unlock” option and follow the on-screen instructions.
    5. Your phone will unlock, allowing you to set a new password.

    Note: This method works only if your device is connected to the internet and has the “Find My Mobile” feature enabled.


    2. Using Google’s Find My Device

    If you’ve linked your Samsung phone to a Google account, you can use Google’s Find My Device service to unlock it. However, this method often requires you to erase the phone’s data.

    Steps:

    1. Go to the Google Find My Device website on another device.
    2. Sign in with your Google account credentials.
    3. Select the locked Samsung phone from the list of devices.
    4. Click on the “Erase Device” option. This will reset your phone to factory settings and remove the password.

    Important: This method will delete all the data on your device unless you’ve backed it up beforehand.


    3. Using Smart Lock

    Samsung’s Smart Lock feature can help you unlock your phone without a password if it’s enabled. Smart Lock keeps your phone unlocked in certain trusted situations, such as when connected to a specific Wi-Fi network or when it detects a trusted device nearby.

    Steps:

    1. Ensure your phone is in a trusted location or connected to a trusted device (e.g., a smartwatch or Bluetooth speaker).
    2. Your phone should automatically unlock if the Smart Lock criteria are met.
    3. Once unlocked, reset your password through the phone’s security settings.

    4. Using Recovery Mode to Perform a Factory Reset

    If none of the above methods work, you can use Recovery Mode to perform a factory reset. While this will erase all data on your phone, it’s an effective way to regain access.

    Steps:

    1. Turn off your Samsung phone.
    2. Press and hold the Volume Up, Power, and Home (if available) buttons simultaneously until the Samsung logo appears.
    3. Use the volume buttons to navigate to “Wipe data/factory reset” and select it using the Power button.
    4. Confirm the action and wait for the reset process to complete.
    5. Once the phone restarts, you can set it up as a new device.

    Caution: This method will delete all personal data, so use it as a last resort.


    5. Using Third-Party Software

    Several third-party tools are designed to unlock Samsung phones without passwords. These tools often support various models and can bypass locks without erasing data.

    Popular Tools:

    • Dr.Fone – Screen Unlock (Android): This software can remove screen locks on many Android devices, including Samsung.
    • iMyFone LockWiper (Android): Another reliable option for bypassing PINs, patterns, and passwords.

    Steps:

    1. Download and install the unlocking software on your computer.
    2. Connect your Samsung phone to the computer using a USB cable.
    3. Follow the on-screen instructions to bypass the lock.

    Note: Ensure you download these tools from their official websites to avoid malware or scams.


    6. Contact Samsung Support

    If all else fails, reaching out to Samsung support may be your best option. They can guide you through unlocking your device or recommend a certified repair center.

    Steps:

    1. Visit the Samsung Support page.
    2. Enter your phone’s model number and describe your issue.
    3. Follow their recommendations or schedule a service appointment.

    Preventing Future Lockouts

    After successfully unlocking your Samsung phone, take these steps to prevent similar issues in the future:

    1. Set Up Biometric Authentication: Use fingerprint or face recognition for easier access.
    2. Enable Find My Mobile: Ensure this feature is active to allow remote unlocking.
    3. Write Down Your Password: Store it in a secure location or use a password manager.
    4. Regular Backups: Keep your data backed up to prevent loss during emergencies.

    Conclusion

    Forgetting your Samsung phone password can be stressful, but there are multiple ways to resolve the issue. Whether you use Samsung’s Find My Mobile, Google’s Find My Device, Smart Lock, or third-party software, you now know how to unlock a Samsung phone without a password. Remember to take precautions to avoid getting locked out again and always back up your data for added peace of mind.

    With these solutions at your disposal, you’ll never have to worry about being locked out of your Samsung phone again. Whether you’re tech-savvy or a beginner, these methods provide reliable options for accessing your device.

  • Best Budget Samsung Smartphone

    Best Budget Samsung Smartphone

    The Best Budget Samsung Smartphone: Affordable Excellence

    When it comes to smartphones, Samsung is a name synonymous with innovation and quality. Known for its flagship devices like the Galaxy S and Z series, Samsung also excels in the budget smartphone category, offering feature-packed options at affordable prices. For those seeking quality without breaking the bank, the best budget Samsung smartphone can deliver an exceptional experience, blending performance, design, and value.

    In this blog, we’ll explore why Samsung is a reliable choice for budget smartphones, highlight some top models, and offer tips for choosing the best budget Samsung smartphone to suit your needs.


    Why Choose a Samsung Budget Smartphone?

    Samsung has solidified its reputation as a leading smartphone manufacturer, catering to all price ranges. Here’s why their budget smartphones are worth considering:

    1. Trusted Brand: Samsung’s extensive expertise ensures even its affordable models maintain a high standard of quality.
    2. Wide Range of Choices: From the Galaxy A series to the Galaxy M series, Samsung offers a variety of budget-friendly options.
    3. Advanced Features: Samsung incorporates features like AMOLED displays, powerful processors, and long-lasting batteries into its budget smartphones.
    4. Software Updates: Samsung provides regular updates for most of its devices, ensuring security and performance improvements.
    5. Service and Support: With a global presence, Samsung’s after-sales service is reliable and accessible.

    Top Picks for the Best Budget Samsung Smartphone in 2025

    1. Samsung Galaxy A14 5G

    Price Range: $200–$250

    The Galaxy A14 5G is an excellent example of how Samsung balances affordability and functionality.

    • Display: A 6.6-inch FHD+ PLS LCD screen with a 90Hz refresh rate for smooth visuals.
    • Performance: Powered by the MediaTek Dimensity 700 or Exynos 1330 (varies by region), it delivers reliable performance for everyday tasks and casual gaming.
    • Battery: A 5000mAh battery ensures all-day usage, supported by 15W fast charging.
    • Camera: Triple camera setup with a 50MP primary sensor, 2MP macro lens, and 2MP depth sensor for versatile photography.

    This model is ideal for users looking for a 5G-enabled device at a low price.


    2. Samsung Galaxy M14 5G

    Price Range: $180–$230

    The Galaxy M14 5G is part of Samsung’s M series, known for its robust battery life and practical features.

    • Display: A 6.6-inch PLS LCD with Full HD+ resolution.
    • Processor: It’s equipped with the Exynos 1330 chipset, delivering smooth multitasking and gaming experiences.
    • Battery: A massive 6000mAh battery makes it perfect for heavy users.
    • Camera: A triple-camera setup featuring a 50MP main sensor ensures sharp and detailed photos.

    With its large battery and capable performance, the Galaxy M14 5G is a great option for students and professionals alike.


    3. Samsung Galaxy A04s

    Price Range: $120–$150

    For users with a tighter budget, the Galaxy A04s delivers core features without compromising quality.

    • Display: A 6.5-inch HD+ PLS LCD display with a 90Hz refresh rate.
    • Processor: Exynos 850 provides efficient performance for light use.
    • Battery: A 5000mAh battery ensures you don’t run out of power during the day.
    • Camera: A 50MP primary camera supported by macro and depth sensors.

    This is one of the best budget Samsung smartphones for users who need a reliable device for everyday tasks like calling, browsing, and streaming.


    4. Samsung Galaxy A13

    Price Range: $150–$200

    The Galaxy A13 is a stylish budget phone with great camera capabilities.

    • Display: A 6.6-inch PLS LCD with Full HD+ resolution for vivid visuals.
    • Processor: Exynos 850 chipset delivers smooth performance.
    • Battery: A 5000mAh battery with 15W fast charging ensures convenience.
    • Camera: Quad-camera setup with a 50MP main sensor for excellent photos.

    Its sleek design and solid camera make it a great option for content creators on a budget.


    5. Samsung Galaxy M04

    Price Range: $100–$130

    If affordability is your top priority, the Galaxy M04 is a no-frills smartphone that covers the basics.

    • Display: A 6.5-inch HD+ PLS LCD display.
    • Processor: MediaTek Helio P35 chipset for basic multitasking.
    • Battery: A 5000mAh battery for all-day performance.
    • Camera: Dual-camera setup with a 13MP primary sensor.

    This is a perfect choice for first-time smartphone users or as a secondary device.


    How to Choose the Best Budget Samsung Smartphone

    When selecting the best budget Samsung smartphone, consider these factors:

    1. Purpose of Use:
      • For gaming or multitasking, opt for a device with a powerful processor like the Galaxy A14 5G.
      • For basic use, the Galaxy M04 or A04s will suffice.
    2. Camera Requirements:
      • If photography is important, choose models with advanced camera setups like the Galaxy A13.
    3. Battery Life:
      • Heavy users should prioritize phones with large batteries, such as the Galaxy M14 5G.
    4. 5G Compatibility:
      • Future-proof your device by selecting a 5G-enabled model like the Galaxy A14 or M14.
    5. Display Quality:
      • Look for FHD+ displays if you frequently watch videos or browse content.
    6. Budget:
      • Samsung offers quality options in various price ranges, so set a budget and choose accordingly.

    Tips to Maximize Your Samsung Budget Smartphone Experience

    • Update Software Regularly: Keep your phone up-to-date for improved security and performance.
    • Use Samsung Ecosystem Features: Take advantage of Samsung services like SmartThings and Samsung Health.
    • Protect Your Device: Invest in a durable case and screen protector to extend the phone’s life.

    Conclusion

    Samsung continues to dominate the budget smartphone market by offering reliable, feature-rich devices at affordable prices. Whether you prioritize camera quality, battery life, or 5G connectivity, there’s a Samsung phone that fits your needs and budget.

    Choosing the best budget Samsung smartphone ensures you get a device that balances performance and value. With options like the Galaxy A14 5G, Galaxy M14, and Galaxy A04s, Samsung proves that quality doesn’t always come with a hefty price tag.

  • Samsung unveils Oculus-powered ‘Gear VR Innovator Edition’

    Samsung unveils Oculus-powered ‘Gear VR Innovator Edition’

    During its developer conference in San Francisco, Samsung today announced the Oculus-powered ‘Gear VR Innovator Edition’. The new VR headset is compatible with the Galaxy Note 4’s 5.7-inch display for developers to create a 360-degree immersive experience.

    Developers can access the Oculus Mobile SDK for Gear VR, now available at develper.oculus.com. Once users download the Oculus software to their Note 4 devices, they will receive special applications such as Cinema, Home, Store, and 360 Videos and Photos to work with.

    Some of the content partners that Samsung has tied up with include Harmonix, DreamWorks, Vevo, and Temple Run.

    The Gear VR features a touchpad, back button, and a focus adjustment wheel. The Gear VR Innovator Edition is currently available only in the US, and starts shipping in ‘early December’. However, Samsung is yet to announce the pricing.


  • Samsung announces Gear Circle for instant hands-free communication

    Samsung announces Gear Circle for instant hands-free communication

    Samsung has announced a new gadget that lets you enjoy instant hands-free communication. The new device called the Gear Circle happens to be both lightweight and sweat resistant.

    The device’s design allows for the wireless stereo headphone to sit around your neck, which vibrates when you have an incoming call. Besides, it also supports other Bluetooth-enabled devices and features touch controls that make it easy to receive calls when you’re on the go.

    The Gear Circle boasts nine hours of playtime and 11 hours of talk time. The earphones can also be detached. Besides, users can receive voice notifications using Text-to-Speech through S Voice.

    The Gear Circle is now available for purchase in several T-Mobile stores. It will also be available at AT&T, Samsung, BestBuy, and Amazon. The device will be offered in black, blue, and white color options. However, the white color variant will be exclusively available at BestBuy.

  • Galaxy Note Edge will be available in the US starting Nov.14

    Galaxy Note Edge will be available in the US starting Nov.14

    Samsung has been rather quiet about the launch of the Galaxy Note Edge apart from a handful of select markets. Though soon enough, interested buyers will be able to get their hands on the device, as the company has now unveiled the US release date of the Galaxy Note Edge.

    In a press release, Samsung stated that the Galaxy Note Edge will be available starting November 14, 2014 via AT&T, Sprint, Verizon, and US Cellular. Besides, customers can also buy the handset through Samsung experience stores within Best Buy locations. The Galaxy Note Edge will be available in Charcoal Black and Frost White color options.

    However, apart from T-Mobile, specific pricing and availability have not been announced at this point. That said, it’s safe to assume that customers will be able to get their hands on the Note Edge on some type of contract, as well as off-contract. T-Mobile has also confirmed that it will begin selling the Galaxy Note Edge starting November 14th for $0 down (and $36.25/month for 24 months) online and in participating stores nationwide.

    Key specs on the Galaxy Note Edge include a 5.6-inch Quad HD Super AMOLED display. The company claims that the handset is designed to deliver a unique smartphone experience with a side display that is housed on the right edge of the device. The Edge display gives users access to email, Internet, apps, notifications, news, and more, without interrupting with the contents of the primary display.

    Elsewhere, the handset features a 16MP rear camera with autofocus and Smart OIS. For selfies, there’s a 3.7MP front-facing shooter with an f/1.9 lens. Juicing up the handset is 3000mAh battery.