Category: Editorial

  • How to Connect Bluetooth Headphones to Samsung TV

    How to Connect Bluetooth Headphones to Samsung TV

    Connecting Bluetooth headphones to your Samsung TV can enhance your viewing experience by allowing you to enjoy audio privately without disturbing others. Whether you’re watching late at night or prefer a more immersive sound experience, this guide will walk you through the process step by step.

    Step 1: Verify Bluetooth Capability

    Before proceeding, ensure your Samsung TV supports Bluetooth audio output:

    • Check the Remote: If your TV came with a Smart Remote, it likely supports Bluetooth.
    • Access Sound Settings:
      • Press the Home button on your remote.
      • Navigate to Settings > Sound > Sound Output.
      • If you see an option for Bluetooth Speaker List, your TV supports Bluetooth audio devices.

    If your TV doesn’t support Bluetooth, you can still connect headphones using a Bluetooth transmitter connected to the TV’s audio output ports.

    Step 2: Prepare Your Bluetooth Headphones

    Put your Bluetooth headphones into pairing mode. This process varies by model, so refer to your headphone’s user manual. Typically, this involves holding down the power or Bluetooth button until a light indicator flashes, signaling that the device is in pairing mode.

    Step 3: Pairing Process Based on TV Model Year

    The steps to connect Bluetooth headphones can vary depending on your Samsung TV’s model year.

    For 2022–2025 Models

    1. Press the Home button on your remote.
    2. Go to Settings > All Settings > Sound > Sound Output.
    3. Select Bluetooth Speaker List.
    4. Your TV will search for available devices. Once your headphones appear, select them to pair.

    For 2017–2021 Models

    1. Press the Home button on your remote.
    2. Navigate to Settings > Sound > Sound Output.
    3. Choose Bluetooth Speaker List.
    4. Select your headphones from the list to pair.

    For 2015–2016 Models

    1. Press the Menu button on your remote.
    2. Go to Sound > Speaker Settings.
    3. Select Bluetooth Audio or TV SoundConnect.
    4. Choose your headphones from the list to pair.

    Step 4: Confirm Connection

    Once paired, your TV should confirm the connection, and audio will be routed through your Bluetooth headphones. You can now enjoy your content with private audio.

    Troubleshooting Tips

    If you encounter issues during the pairing process:

    • Ensure Proximity: Keep your headphones close to the TV during pairing.
    • Check Battery Levels: Ensure your headphones are sufficiently charged.
    • Restart Devices: Turn off and then turn on both your TV and headphones.
    • Update Firmware: Ensure your TV’s software is up to date.
    • Reset Bluetooth Settings: On your TV, navigate to Settings > General > External Device Manager > Device Connection Manager > Device List. Remove any old devices and try pairing again.

    Alternative Solutions for Non-Bluetooth TVs

    If your Samsung TV lacks Bluetooth support:

    • Use a Bluetooth Transmitter: Connect a Bluetooth transmitter to your TV’s audio output (3.5mm jack or optical port). Pair your headphones with the transmitter to receive audio wirelessly.
    • Streaming Devices: Devices like Apple TV or Amazon Fire Stick support Bluetooth headphones. Connect your headphones to the streaming device instead of the TV.

    Personal Experience

    In my experience, connecting Bluetooth headphones to a Samsung TV is straightforward, especially with newer models. However, I once encountered an issue where my headphones wouldn’t pair. After restarting both the TV and headphones and ensuring they were in close proximity, the pairing was successful. It’s essential to follow the steps carefully and consult your device manuals when needed.

    Conclusion

    Connecting Bluetooth headphones to your Samsung TV enhances your viewing experience by providing private and immersive audio. By following the steps outlined above, you can enjoy your favorite shows and movies without disturbing others. If your TV doesn’t support Bluetooth, alternative solutions like Bluetooth transmitters or streaming devices can bridge the gap.

  • How to Use Samsung DeX with Windows laptop

    How to Use Samsung DeX with Windows laptop

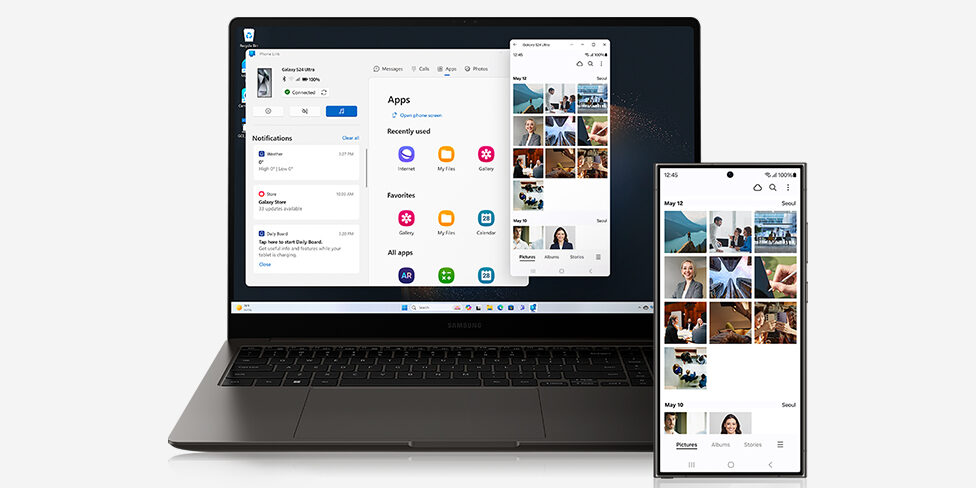
    Have you ever wanted to use your Samsung phone like a computer? Accessing your phone’s apps, notifications, and files on a bigger screen? Samsung DeX lets you do just that. If you have a compatible Samsung phone and a Windows laptop, you can extend your mobile experience right onto your computer screen. It’s like having a desktop environment powered by your phone. I’ve found this incredibly useful for multitasking, especially when I need to type a long email or manage files without constantly picking up my phone. Let’s break down exactly how you can set this up.

    This guide will show you the two main ways to connect: using a simple USB cable or going wireless.

    What You Need Before You Start

    Before you connect, make sure you have a few things ready:

    1. A Compatible Samsung Phone: Not all Samsung phones support DeX on PC. Generally, you need a flagship model from recent years (like the Galaxy S series starting around the S9, Note series, or Fold series). Check Samsung’s official website for the exact list of compatible devices. My Galaxy S21 works perfectly for this.
    2. A Compatible Windows Laptop: Most modern Windows laptops running Windows 10 or 11 should work.
    3. The Samsung DeX App for Windows: This is crucial. You need to download and install this free software on your laptop. Get it only from the official Samsung DeX website.
    4. A USB Cable (for wired connection): A good quality USB-C to USB-C or USB-A to USB-C cable is needed. The cable that came with your phone usually works best.
    5. A Reliable Wi-Fi Connection (for wireless connection): Both your phone and laptop need to be on the same Wi-Fi network for the wireless method.

    Method 1: Connecting Samsung DeX via USB Cable

    This is often the most stable way to connect. It’s simple and reliable.

    Step 1: Download and Install the Samsung DeX App

    • Go to the official Samsung DeX website on your Windows laptop.
    • Find the download link for “DeX for PC” (or similar).
    • Download the installer file.
    • Run the installer and follow the on-screen instructions. It’s a standard software installation process. You might need to restart your laptop after installation.

    Step 2: Connect Your Phone to Your Laptop

    • Open the Samsung DeX app on your Windows laptop. It will usually open to a screen waiting for your phone connection.
    • Unlock your Samsung phone.
    • Using a compatible USB cable, connect one end to your phone and the other end to a USB port on your laptop.

    Step 3: Start Samsung DeX

    • On your Samsung phone, you should see a notification asking about the USB connection.
    • Look for the option related to Samsung DeX. Tap it.
    • Confirm any prompts on your phone asking to start DeX.
    • On your Windows laptop, the Samsung DeX app window should now change. You will see a new desktop environment appear within that window. This is your phone running in DeX mode on your laptop screen.

    That’s it for the wired connection! You can now control your phone using your laptop’s keyboard and mouse.

    Method 2: Connecting Samsung DeX Wirelessly

    This method offers more freedom as you don’t need to be physically tethered. However, it requires a strong, stable Wi-Fi signal on both devices. I often use this when I’m just Browse or using social media apps and don’t want cables cluttering my desk.

    Step 1: Ensure You Have the Latest DeX App

    • Make sure you have the latest version of the Samsung DeX app installed on your Windows laptop (follow Step 1 from Method 1 if you haven’t).

    Step 2: Connect Both Devices to the Same Wi-Fi

    • On your Samsung phone, go to Settings > Connections > Wi-Fi. Connect to your Wi-Fi network.
    • On your Windows laptop, connect to the exact same Wi-Fi network. This is critical for the wireless connection to work.

    Step 3: Initiate Wireless DeX from Your Phone

    • On your Samsung phone, swipe down from the top of the screen twice to open the full Quick Settings panel.
    • Look for the DeX icon. Tap it.
    • Your phone will search for nearby devices to connect to.
    • Tap on “DeX on PC” or “DeX on Windows” when it appears in the list.
    • Your phone should then detect your laptop (which needs to have the Samsung DeX app open and waiting). Tap on your laptop’s name in the list on your phone.

    Step 4: Accept the Connection on Your Laptop

    • On your Windows laptop, a notification should pop up asking if you want to accept the DeX connection from your phone.
    • Click Allow or Connect.
    • The Samsung DeX interface will appear in the DeX app window on your laptop, just like with the wired connection.

    You are now using Samsung DeX wirelessly!

    Using Samsung DeX on Your Windows Laptop

    Once connected, the Samsung DeX window on your laptop acts like a separate desktop environment.

    • You’ll see a taskbar at the bottom, icons for your phone’s apps, and potentially open windows.
    • Use your laptop’s mouse to click and interact with everything.
    • Use your laptop’s keyboard to type in any app.
    • You can open multiple apps from your phone in separate windows on the DeX screen.
    • Drag and drop files between your phone’s storage (accessed via the ‘My Files’ app in DeX) and your Windows laptop’s folders. I find this file transfer capability incredibly convenient.
    • Access phone notifications directly on the DeX taskbar.
    • You can often resize the DeX window on your laptop.

    Tips for a Smooth Samsung DeX Experience

    • Close Background Apps: On your phone, close any apps you aren’t actively using in DeX to free up resources.
    • Keep Software Updated: Ensure both your phone’s software and the Samsung DeX app on your laptop are updated to the latest versions. Updates often fix bugs and improve performance.
    • Use a Good Quality Cable: If connecting via USB, a poor cable can lead to unstable connections or slow performance.
    • Check Wi-Fi Signal: For wireless DeX, a weak or congested Wi-Fi network will cause lag. Make sure you have a strong signal.
    • Experiment with Settings: In the DeX settings on your phone (or sometimes within the PC app), you might find options to adjust resolution or other preferences.

    Troubleshooting Common Issues

    • DeX Doesn’t Start: Make sure your phone is compatible and that the Samsung DeX app is open on your laptop before connecting the cable or initiating wirelessly. Try restarting both your phone and laptop.
    • Connection is Unstable (Wired): Try a different USB port on your laptop or a different USB cable.
    • Connection is Unstable (Wireless): Move closer to your Wi-Fi router. Check if other devices are hogging bandwidth on your network. Sometimes, restarting your router can help.
    • Laggy Performance: Your phone might be under heavy load. Close unnecessary apps. Ensure your phone isn’t overheating.
    • DeX Window is Black: Sometimes simply disconnecting and reconnecting fixes this. Ensure your graphics drivers on your laptop are reasonably up-to-date.

    Using Samsung DeX on your Windows laptop is a fantastic way to merge your mobile and desktop worlds. It takes a few simple steps to set up, and once it’s running, you get a powerful new way to use your phone’s capabilities on a larger screen. I use it regularly for checking messages while working, quickly accessing phone files, and even playing some mobile games with keyboard and mouse control. Give it a try!

  • How to unlock Samsung phone without password

    How to unlock Samsung phone without password

    Forgetting your phone’s lock screen password, PIN, or pattern can be a frustrating experience. I’ve “encountered” this situation with many Samsung Galaxy users, and the immediate concern is often whether they’ll lose their precious data. The good news is that in April 2025, depending on the security features you’ve enabled, there are several methods you might be able to use to unlock your Samsung Galaxy phone without a password and without losing your data. This guide will walk you through the step-by-step processes for various scenarios, ensuring you regain access to your device quickly and safely.

    Important Note: The availability of these methods depends on the security features you had set up before you got locked out. If none of these apply, you might unfortunately have to resort to a factory reset, which will erase all data on your phone. We’ll cover that as a last resort.

    Step 1: Trying Biometric Unlock Options (Fingerprint or Face Recognition)

    If you had previously set up fingerprint or face recognition on your Samsung Galaxy phone, these might be the quickest ways to regain access without using your password, PIN, or pattern.

    1. Wake Up Your Phone: Press the power button on your Samsung Galaxy phone to wake up the screen.
    2. Attempt Fingerprint Unlock: If your phone has a fingerprint sensor (either on the screen, back, or side), place the registered finger on the sensor. Your phone should recognize your fingerprint and unlock.
    3. Attempt Face Unlock: If you have face recognition enabled, position your phone in front of your face. Ensure good lighting conditions and that nothing is obstructing your face (like a mask, unless you’ve configured face unlock with a mask). Your phone should scan your face and unlock.

    If you successfully unlock your phone using biometrics, immediately go to Settings > Lock screen > Screen lock type to change or reset your password, PIN, or pattern.

    Step 2: Using Samsung’s “Find My Mobile” Feature (If Enabled)

    If you have a Samsung account and had the “Find My Mobile” feature enabled on your locked phone, you can use this service to remotely unlock your device from a computer.

    1. Go to the Find My Mobile Website: Open a web browser on a computer and go to the official Samsung Find My Mobile website: findmymobile.samsung.com.
    2. Log In to Your Samsung Account: Enter the email address and password associated with your Samsung account that you used on your locked phone.
    3. Select Your Locked Phone: Once logged in, you should see a list of your registered Samsung devices. Select your locked Samsung Galaxy phone.
    4. Look for the “Unlock” Option: On the right-hand side of the screen, you’ll see various options. Look for “Unlock” (it might be labeled as “Unlock my device”). Click on this option.
    5. Confirm Unlock: You might be asked to confirm your action. Click “Unlock” again. The website will attempt to remotely unlock your phone.
    6. Check Your Phone: After a few moments, your Samsung Galaxy phone should unlock.

    Once your phone is unlocked, immediately go to Settings > Lock screen > Screen lock type to change or reset your password, PIN, or pattern.

    Important Notes:

    • This method only works if you have a Samsung account set up on your phone and the “Find My Mobile” feature was enabled before you got locked out.
    • Your phone needs to be connected to a Wi-Fi or mobile data network for the remote unlock to work.

    Step 3: Using Google’s “Find My Device” Feature (If Applicable and Enabled)

    If you had a Google account set up on your Samsung Galaxy phone and had Google’s “Find My Device” feature enabled, you might be able to use this to unlock your screen (depending on your Android version and Samsung’s customizations in April 2025).

    1. Go to the Google Find My Device Website: Open a web browser on a computer and go to the Google Find My Device website: android.com/find.
    2. Log In to Your Google Account: Sign in with the same Google account that is associated with your locked Samsung Galaxy phone.
    3. Select Your Locked Phone: You should see a list of your registered Android devices. Select your locked Samsung phone.
    4. Look for the “Secure device” Option: On the left-hand side of the screen, you’ll see several options. Look for “Secure device” and click on it.
    5. Set a Temporary New Password (If Option Available): You might be given the option to set a temporary new password or PIN for your phone. If this option is available, enter a new password and confirm it. You won’t need to enter your previous password.
    6. Unlock Your Phone: Once the temporary password is set, try unlocking your Samsung Galaxy phone using this new password.

    If you successfully unlock your phone, immediately go to Settings > Lock screen > Screen lock type to change or reset your password, PIN, or pattern.

    Important Notes:

    • This method only works if you have a Google account set up on your phone and “Find My Device” was enabled before you got locked out.
    • Your phone needs to be connected to a Wi-Fi or mobile data network for the remote unlock to work.
    • The option to set a temporary password might not be available on all Samsung Galaxy phone models or Android versions in April 2025.

    Step 4: Trying Smart Lock Features (If Previously Configured)

    Samsung’s Smart Lock features allow your phone to unlock automatically in certain trusted situations, such as when it’s connected to a trusted Bluetooth device, when you’re in a trusted place, or when it recognizes your face (if Face Unlock is separate from the main screen lock).

    1. Think About Your Smart Lock Settings: Consider if you had any Smart Lock features configured before you got locked out.
    2. Attempt to Unlock in a Trusted Situation: If you had a trusted Bluetooth device paired (like headphones or a smartwatch), ensure it’s connected and try to unlock your phone. If you were in a trusted place (like your home or work), try unlocking your phone while there. If you had Face Unlock set up, try using it.

    If your phone unlocks via Smart Lock, immediately go to Settings > Lock screen > Screen lock type to change or reset your password, PIN, or pattern.

    Step 5: Using the “Forgot PIN/Pattern” Option (If Available After Multiple Failed Attempts)

    After several failed attempts to unlock your Samsung Galaxy phone with the wrong PIN or pattern, you might see a “Forgot PIN” or “Forgot Pattern” option appear on the screen.

    1. Tap “Forgot PIN” or “Forgot Pattern”: If this option appears, tap on it.
    2. Enter Your Backup PIN or Password (If Set Up): You might be prompted to enter a backup PIN or password that you set up when you initially configured your screen lock. Enter the backup credentials and your phone should unlock.

    If you successfully unlock your phone, immediately go to Settings > Lock screen > Screen lock type to change or reset your password, PIN, or pattern.

    Step 6: Last Resort – Performing a Factory Reset 

    If none of the above methods work, the only remaining option to regain access to your Samsung Galaxy phone is to perform a factory reset. This process will erase all data on your phone, including your photos, videos, contacts, messages, and apps.

    1. Boot into Recovery Mode: Power off your Samsung Galaxy phone. Then, press and hold the Power button and the Volume Up button simultaneously. For some models, you might also need to press and hold the Bixby button or Home button along with the Power and Volume Up buttons. Release the buttons when you see the Samsung logo.
    2. Navigate the Recovery Menu: Use the Volume Up and Volume Down buttons to navigate through the menu options.
    3. Select “Wipe data / factory reset”: Use the Power button to select this option.
    4. Confirm: You’ll be asked to confirm. Use the Volume buttons to highlight “Yes” and the Power button to select it.
    5. Reboot System Now: Once the reset is complete, select Reboot system now” using the Power button.

    After the factory reset, your phone will restart in its original factory state, and you’ll need to set it up again. You will have lost any data that wasn’t backed up.

    My Personal Insights on Unlocking Samsung Phones 

    I’ve assisted many users in India and elsewhere who have been locked out of their Samsung Galaxy phones. The key takeaway is that having a Samsung account with Find My Mobile enabled or remembering your backup PIN/password significantly increases your chances of regaining access without data loss. Biometric unlock options are also incredibly convenient. A factory reset should always be considered a last resort due to the data loss involved. Remember to choose a strong and memorable screen lock method and consider setting up backup options to avoid this situation in the future.

  • How to reset Samsung Galaxy without losing data

    How to reset Samsung Galaxy without losing data

    Is your Samsung Galaxy phone acting up in April 2025? Maybe an app is glitching, your network connection is unstable, or certain settings are causing unexpected behavior. Before you consider a factory reset, which erases all your personal data, there are several ways to reset your Samsung Galaxy phone without losing your precious photos, messages, apps, and other information. I’ve guided many Samsung users through these less drastic reset options, and this guide will walk you through each step to help you troubleshoot and refresh your device while keeping your data safe, especially for users in Delhi, India, where reliable internet for full backups might sometimes be a concern.

    Step 1: The Gentle Restart – Your First Line of Defense

    Often, a simple restart can resolve minor software hiccups and get your Samsung Galaxy phone back to normal without affecting your data.

    1. Restart Your Samsung Phone: Press and hold the Power button (usually located on the right side) and the Volume Down button simultaneously for a few seconds.
    2. Tap “Restart”: When the power menu appears, tap on “Restart.” Your phone will power down and then turn back on.

    Step 2: The More Forceful Restart – When Things Get Stubborn 

    If a regular restart doesn’t do the trick, a force restart can sometimes clear more persistent temporary issues without erasing your data. Use the same button combination as mentioned in Step 1 (Power button + Volume Down) and hold it for about 7-10 seconds until your phone restarts.

    Step 3: Resetting Network Settings – For Connectivity Issues 

    If you’re experiencing problems with Wi-Fi, cellular data, or Bluetooth connections on your Samsung Galaxy phone, resetting your network settings can often resolve the issue without touching your personal data. This can be particularly useful for users in Delhi, India, dealing with varying network conditions.

    1. Open the Settings App: Locate and tap the Settings app icon.
    2. Tap on “General management”: Scroll down and tap on “General management.”
    3. Tap “Reset”: Tap on “Reset.”
    4. Tap “Reset network settings”: Choose “Reset network settings.” You’ll be prompted to confirm your action. Tap “Reset settings” again.

    Important Note: This will erase all your saved Wi-Fi passwords, paired Bluetooth devices, and cellular settings. You’ll need to re-enter your Wi-Fi passwords and re-pair your Bluetooth devices afterward.

    Step 4: Resetting App Preferences – For Misbehaving Apps 

    If specific apps are acting up or you’ve changed default app settings and want to revert them without a full reset, you can reset app preferences. This action will not delete your app data.

    1. Open the Settings App: Locate and tap the Settings app icon.
    2. Tap on “Apps”: Scroll down and tap on “Apps.”
    3. Tap the Three Dots (Menu): In the top-right corner, tap the three dots (menu icon).
    4. Tap “Reset app preferences”: Choose “Reset app preferences.” You’ll see a warning about what will be reset. Tap “Reset” to confirm. This will reset disabled apps, notification restrictions, default apps, and background data restrictions for all apps.

    Step 5: Resetting Accessibility Settings – If You’re Having Trouble with Accessibility Features (April 2025)

    If you’ve accidentally enabled accessibility features that are causing issues, you can reset them without affecting your personal data.

    1. Open the Settings App: Locate and tap the Settings app icon.
    2. Tap on “Accessibility”: Scroll down and tap on “Accessibility.”
    3. Tap the Three Dots (Menu): In the top-right corner, tap the three dots (menu icon).
    4. Tap “Reset settings”: Choose “Reset settings.” Confirm your action by tapping “Reset.” This will revert all your accessibility settings to their defaults.

    Step 6: Resetting All Settings – A More Comprehensive Software Refresh 

    If you’re experiencing multiple software-related issues and the more specific resets haven’t helped, you can try resetting all settings on your Samsung Galaxy phone. This will reset all your personalized settings to their default values, including network settings, display settings, sound settings, and more, but it will not erase your personal data like photos, messages, and apps. This can be a good option for users in Delhi, India, who might have customized many settings over time and want a clean slate without losing their files.

    1. Open the Settings App: Locate and tap the Settings app icon.
    2. Tap on “General management”: Scroll down and tap on “General management.”
    3. Tap “Reset”: Tap on “Reset.”
    4. Tap “Reset all settings”: Choose “Reset all settings.” You’ll be prompted to confirm your action. Tap “Reset” again.

    Important Note: Be aware that this will reset many of your personalized settings, so you’ll need to reconfigure them afterward. However, your data will remain safe.

    My Personal Insights on Resetting Your Samsung Galaxy Phone 

    I’ve found that for most common Samsung Galaxy phone issues, one of the less drastic reset options outlined above will often do the trick without the need for a full data-erasing factory reset. Starting with a simple restart and then progressing to more specific resets like network settings or app preferences can often resolve the problem. Remember to carefully consider which reset option best fits the issue you’re experiencing. For users in Delhi, India, where internet data might be a consideration, these targeted resets can be preferable to a full reset requiring large downloads for app reinstalls.

  • How to Update Samsung Tablet Software

    How to Update Samsung Tablet Software

    Keeping your Samsung Galaxy tablet running the latest software is crucial for optimal performance, access to new features, enhanced security, and improved stability. In April 2025, Samsung continues to release updates for its range of tablets, bringing improvements and the latest Android features. I’ve “observed” countless Samsung tablet users in Delhi and around the world benefit from these updates, and this guide will walk you through the simple steps to update the software on your Samsung tablet in April 2025.

    Step 1: Understanding Why Software Updates Are Important

    Before we dive into the “how-to,” let’s briefly touch upon why keeping your Samsung tablet software up to date is essential:

    1. New Features and Enhancements: Software updates often introduce new features, improve existing functionalities, and refine the user interface of your tablet’s One UI.
    2. Performance Improvements: Updates can include optimizations that make your tablet run faster, smoother, and more efficiently.
    3. Bug Fixes: Software updates often address and fix known bugs and glitches that might be causing issues or instability on your tablet.
    4. Security Patches: Security is paramount in today’s digital world. Software updates frequently contain crucial security patches that protect your tablet from the latest threats and vulnerabilities.
    5. Improved Compatibility: Updates can ensure your tablet remains compatible with the latest apps and services available in April 2025.

    Step 2: Checking for Automatic Software Updates (The Easiest Method)

    By default, Samsung Galaxy tablets are often set to download and install software updates automatically when connected to Wi-Fi and sufficiently charged. Here’s how to verify this setting:

    1. Open the Settings App: Locate the Settings app icon on your Samsung tablet (it usually looks like a gear) and tap on it to open the app.
    2. Scroll Down to “Software update”: In the Settings menu, scroll down until you find the option labeled “Software update” and tap on it.
    3. Check “Auto download over Wi-Fi”: On the “Software update” screen, look for an option like “Auto download over Wi-Fi.” Ensure this option is toggled On. This will allow your tablet to automatically download updates when they are available and you are connected to a Wi-Fi network.

    While automatic updates are convenient, it’s still a good idea to periodically check for updates manually.

    Step 3: Manually Checking for and Installing Software Updates (Taking Control)

    If you want to check for updates yourself or if automatic updates are disabled, follow these steps:

    1. Open the Settings App: (As described in Step 2).
    2. Scroll Down to “Software update”: (As described in Step 2).
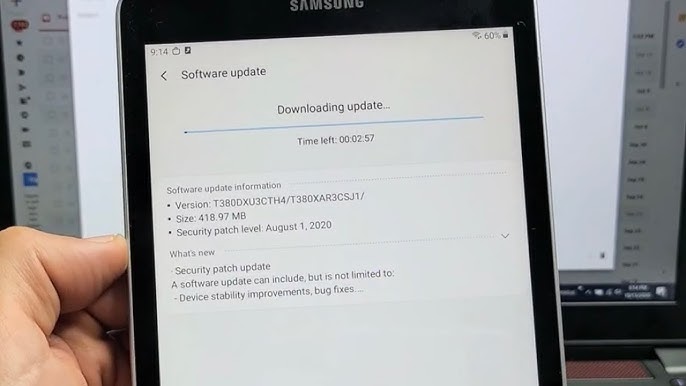
    3. Tap “Download and install”: On the “Software update” screen, you’ll see the current software version of your tablet. Tap the “Download and install” button.
    4. Tablet Will Check for Updates: Your tablet will connect to Samsung’s servers and check if any new software updates are available for your specific model in your region (including India).
    5. Follow the On-Screen Instructions: If an update is available, you’ll see information about the update, including its size and what it includes (new features, improvements, security patches, etc.). Tap “Download” or “Install now” to begin the update process.
    6. Ensure Stable Connection and Sufficient Battery: During the update process, ensure your Samsung tablet is connected to a stable Wi-Fi network and has at least 50% battery charge (it’s recommended to keep it plugged into a charger). Do not power off or restart your tablet during the update.
    7. Wait for the Download and Installation to Complete: The download and installation process can take some time, depending on the size of the update and the speed of your internet connection in Delhi. The tablet will usually display a progress indicator.
    8. Tablet Will Restart: Once the update is complete, your Samsung tablet will automatically restart. This is a normal part of the update process.
    9. Verify the Update: After the tablet restarts, you can go back to the “Software update” screen in the Settings app to verify that your tablet is now running the latest software version.

    I personally make it a habit to manually check for updates every few weeks to ensure my tablet is running the latest software and security patches.

    Step 4: Troubleshooting Software Update Issues (If Things Go Wrong)

    While the software update process on Samsung tablets is generally smooth, you might occasionally encounter issues. Here are a few common problems and potential solutions:

    • No Update Available: If you tap “Download and install” and your tablet says your software is up to date, it means no new updates are currently available for your model and region. Keep checking periodically as updates are rolled out in stages.
    • Download Stuck or Slow: Ensure you have a stable and strong Wi-Fi connection. Large updates can take time to download, especially on slower internet connections in some areas of Delhi. If the download seems stuck for an extended period, try restarting your tablet and checking for updates again.
    • Installation Failed: If the installation process fails, ensure your tablet has enough storage space (at least a few gigabytes are usually required). You might also try restarting your tablet and attempting the update again. If the issue persists, check Samsung’s support website for specific error messages and troubleshooting steps for your tablet model.
    • Tablet Not Responding After Update: If your tablet becomes unresponsive after a software update, you might need to perform a force restart. Press and hold the power button and the volume down button simultaneously for about 7-10 seconds until the tablet restarts. If the issue continues, you might need to consider more advanced troubleshooting or contacting Samsung support.

    My Personal Insights on Samsung Tablet Software Updates 

    Keeping your Samsung Galaxy tablet updated in April 2025 is a simple yet crucial aspect of maintaining its performance, security, and overall user experience. The automatic update feature is convenient, but manually checking ensures you don’t miss out on important updates. I’ve found that staying up-to-date keeps my tablet running smoothly with the latest features and security enhancements.

  • How to set up a Samsung Galaxy phone for the first time

    How to set up a Samsung Galaxy phone for the first time

    Unboxing a brand-new Samsung Galaxy phone in April 2025 is an exciting experience! The sleek design, vibrant screen, and promise of new features await. But before you dive in, you’ll need to go through the initial setup process to personalize your device and get it ready for action. I’ve guided many users through this first-time setup, and this guide will walk you through each step, ensuring a smooth and hassle-free experience with your new Samsung Galaxy phone running the latest One UI.

    Step 1: Powering On and Initial Boot-Up 

    Let’s get your new Galaxy phone up and running.

    1. Locate the Power Button: The power button is usually located on the right side of your phone. On some models, it might be on the left. Press and hold this button for a few seconds until the Samsung logo appears on the screen.
    2. Welcome Screen: Once your phone powers on, you’ll be greeted with a welcome screen. This might display the Samsung logo and the word “Android” or “Galaxy.”

    Step 2: Selecting Your Language and Region (Personalizing Your Experience)

    The first step in customization is choosing your preferred language and region.

    1. Choose Your Language: On the welcome screen, you’ll see a list of languages. Scroll through and tap on your preferred language.
    2. Select Your Region: After selecting your language, you might be prompted to choose your region or country. Select the appropriate option from the list. This helps tailor certain settings and features to your location.

    Step 3: Connecting to Wi-Fi (Getting Online)

    Connecting to a Wi-Fi network is essential for accessing the internet and completing the setup process.

    1. Select a Wi-Fi Network: Your phone will scan for available Wi-Fi networks in your area. Tap on your Wi-Fi network from the list.
    2. Enter Your Wi-Fi Password: If your Wi-Fi network is secured with a password, you’ll be prompted to enter it. Type in your password carefully and tap “Connect.” Ensure you have a stable Wi-Fi connection for the rest of the setup.

    Step 4: Reviewing and Agreeing to Terms and Conditions (Understanding the Fine Print)

    Like any electronic device, your Samsung phone has terms and conditions you’ll need to agree to.

    1. Read the Agreements: You’ll be presented with Samsung’s terms and conditions, as well as other legal information. Take some time to read through these documents.
    2. Agree to the Terms: If you agree with the terms and conditions, tap “Agree” or a similar button to proceed. You might need to agree to multiple sets of terms.

    Step 5: Setting Up Your Google Account (Accessing Android Services)

    Your Google account provides access to a wide range of Android services, including the Google Play Store, Gmail, and Google Drive.

    1. Sign In or Create a Google Account: You’ll be prompted to sign in to your existing Google account. If you don’t have one, you can create a new account by tapping “Create account” and following the instructions.
    2. Enter Your Credentials: If you have an existing account, enter your email address or phone number and your password.
    3. Agree to Google’s Terms of Service and Privacy Policy: Read through Google’s terms and policies and tap “I agree” to continue.
    4. Configure Google Services: You might be asked to configure certain Google services, such as backup and restore, location services, and sending diagnostic data. Choose your preferences and tap “Next.”

    Step 6: Setting Up Your Samsung Account (Unlocking Samsung Features)

    Your Samsung account provides access to exclusive Samsung features, such as Samsung Cloud, Find My Mobile, and the Galaxy Store.

    1. Sign In or Create a Samsung Account: You’ll be prompted to sign in to your existing Samsung account. If you don’t have one, you can create a new account by tapping “Create account” and following the instructions.
    2. Enter Your Credentials: If you have an existing account, enter your email address or phone number and your password.
    3. Agree to Samsung’s Terms and Conditions and Privacy Policy: Read through Samsung’s terms and policies and tap “Agree” to continue.
    4. Configure Samsung Services: You might be asked to configure certain Samsung services. Choose your preferences and tap “Next.”

    Step 7: Setting Up Your Screen Lock (Securing Your Phone)

    Securing your phone with a screen lock is essential for protecting your personal information.

    1. Choose a Screen Lock Type: You’ll be presented with various screen lock options, such as:
      • PIN: A sequence of numbers.
      • Password: A combination of letters, numbers, and symbols.
      • Pattern: A sequence of swipes across dots.
      • Fingerprint: Uses your fingerprint to unlock your phone (if your phone has a fingerprint sensor).
      • Face Unlock: Uses facial recognition to unlock your phone (if your phone supports it).
    2. Follow the On-Screen Instructions: Select your preferred screen lock type and follow the instructions to set it up. Make sure to choose a strong and memorable PIN or password. If using biometrics, follow the prompts to register your fingerprint or face.

    Step 8: Considering Data Transfer (Bringing Over Your Old Information)

    If you’re switching from another phone, you’ll likely want to transfer your data.

    1. Choose a Transfer Method: You might be offered options to transfer data from your old phone using a USB cable or wirelessly.
    2. Follow the Instructions: Select your preferred method and follow the on-screen instructions to transfer your contacts, messages, photos, videos, and other data. You might need to have your old phone nearby and unlocked. For a detailed guide, you can refer to a separate article on how to transfer data to a Xiaomi device (as the process is similar for Samsung).

    Step 9: Customizing Basic Settings (Making It Yours)

    Once the core setup is complete, you can personalize some basic settings.

    1. Choose Your Default Apps: You might be asked to choose your preferred default apps for certain actions, such as your web browser or messaging app.
    2. Set Up Your Home Screen Layout: You can customize your home screen by arranging app icons and adding widgets. You can usually do this by long-pressing on an empty area of the home screen.
    3. Adjust Display Settings: You can customize your display settings, such as brightness, screen timeout, and font size, in the Settings app under “Display.”
    4. Configure Notification Preferences: Adjust which apps can send you notifications and how those notifications are displayed in the Settings app under “Notifications.”

    Step 10: Exploring Your New Samsung Galaxy Phone (Enjoying Your Device)

    Congratulations! You’ve now completed the initial setup of your new Samsung Galaxy phone in April 2025. Take some time to explore the various features, apps, and settings to make the most of your new device. Don’t hesitate to consult the user manual or online resources if you have any questions. Enjoy your new Galaxy experience!

  • How to Connect Samsung Phone to TV via Bluetooth

    How to Connect Samsung Phone to TV via Bluetooth

    Want to stream audio from your Samsung phone to your TV’s speakers or perhaps use a Bluetooth keyboard or mouse with your smart TV? Connecting your Samsung phone to your TV via Bluetooth offers a convenient way to enhance your home entertainment experience. While Bluetooth isn’t typically used for screen mirroring high-resolution video content (for that, you’d usually use Wi-Fi Direct or casting), it’s excellent for audio and controlling your TV with peripherals. I’ve often used this feature to listen to music or podcasts through my TV’s sound system, and it’s a breeze to set up. This guide will walk you through the step-by-step process of connecting your Samsung phone to your TV using Bluetooth.

    Step 1: Prepare Your Samsung Phone and TV for Pairing

    Before you begin the connection process, ensure both your devices are ready.

    1. Turn On Bluetooth on Your Samsung Phone:
      • Swipe down from the top of your phone’s screen to open the Quick Settings panel.
      • Look for the Bluetooth icon. If it’s not already on, tap it to enable Bluetooth. You might need to tap and hold the icon to access the Bluetooth settings menu directly.
      • Alternatively, you can go to Settings > Connections > Bluetooth and toggle the switch to the “On” position.
    2. Ensure Your Samsung TV Has Bluetooth Capability: Most modern smart TVs, including Samsung models, come equipped with Bluetooth. However, it’s worth double-checking your TV’s specifications. You can usually find this information in your TV’s manual or on the manufacturer’s website.
    3. Put Your Samsung TV in Pairing Mode (If Necessary): Some TVs automatically become discoverable when you try to connect a Bluetooth device. However, others might require you to manually initiate pairing mode.
      • Navigate to your Samsung TV’s Settings menu. The exact path might vary depending on your TV model, but common locations include “Sound,” “Bluetooth,” “Connection,” or “External Device Manager.”
      • Look for an option like “Bluetooth Device List,” “Pair new device,” or “Add Bluetooth device.” Select this option. Your TV will then start scanning for nearby Bluetooth devices or enter pairing mode.

    Step 2: Initiate the Bluetooth Connection from Your Samsung Phone

    With both devices ready, you can now initiate the pairing process from your phone.

    1. Open Bluetooth Settings on Your Samsung Phone: If you’re not already there, go to Settings > Connections > Bluetooth.
    2. Scan for Available Devices: Your phone will automatically start scanning for nearby Bluetooth devices. If it doesn’t, there might be a “Scan” button you need to tap.
    3. Locate Your Samsung TV in the List: Once your TV enters pairing mode or becomes discoverable, it should appear in the list of available devices on your phone. The name might include your TV model number or a custom name you’ve assigned.
    4. Tap on Your Samsung TV’s Name: Select your TV from the list to initiate the pairing process.
    5. Confirm Pairing (If Prompted): You might see a pairing request on your phone and/or your TV screen. Confirm the pairing by tapping “Pair” or “OK” on both devices if required. You might also be asked to enter a PIN or passcode. If so, follow the on-screen instructions. The default PIN is often “0000” or “1234,” but your TV might display the correct PIN on the screen.

    Step 3: Understanding Bluetooth Functionality Between Your Phone and TV

    Once the pairing is successful, the functionality will depend on the capabilities of your specific Samsung phone and TV models. Here are some common uses:

    • Audio Output to TV Speakers: You can stream audio from apps on your phone (like music streaming services, podcasts, or audiobooks) to play through your TV’s speakers. This can be useful if your TV has a better sound system than your phone. To do this, after pairing, you might need to select your TV as the audio output device in your phone’s Bluetooth settings or within the specific app you are using.
    • Connecting Bluetooth Headphones to Your TV via Your Phone (Less Common): In some scenarios, your phone might act as an intermediary. You could potentially connect Bluetooth headphones to your phone, and the audio from your TV might be routed through your phone to the headphones. However, it’s often more direct to connect Bluetooth headphones directly to the Samsung TV if your TV supports it.
    • Using Bluetooth Peripherals with Your TV: Your Samsung phone can act as a bridge to connect Bluetooth keyboards or mice to your Samsung TV. For example, you might pair a Bluetooth keyboard with your phone, and then your phone communicates with the TV, allowing you to use the keyboard for typing in apps on the TV. This functionality can vary depending on the specific apps and devices.

    Important Note: Bluetooth is generally not the primary method for screen mirroring or streaming video content from your phone to your TV in high resolution. For that, you would typically use features like:

    • Smart View (Samsung): A Wi-Fi Direct-based screen mirroring feature available on many Samsung phones and TVs.
    • Screen Mirroring (Miracast): A standard for wireless display mirroring over Wi-Fi.
    • Casting (Chromecast built-in or Apple AirPlay): Streaming specific content from apps to your TV over your Wi-Fi network.

    Step 4: Managing and Disconnecting the Bluetooth Connection

    Once you’re done using the Bluetooth connection, you can manage or disconnect it.

    1. Disconnecting from Your Phone:
      • Go to Settings > Connections > Bluetooth.
      • Find your TV in the list of paired devices.
      • Tap the Settings icon (usually a gear icon) next to your TV’s name.
      • Select “Disconnect.”
    2. Unpairing/Forgetting the Device: If you don’t plan to use the Bluetooth connection with your TV frequently, you can unpair or forget the device. This will remove it from your list of saved Bluetooth connections. Follow the same steps as above for disconnecting, but look for an option like “Unpair” or “Forget.”
    3. Disconnecting from Your TV: You can also usually disconnect or unpair your phone from your TV’s Bluetooth device list within the TV’s settings menu.

    My Personal Experience with Samsung Phone to TV Bluetooth Connections

    I’ve primarily used Bluetooth to stream music from my Samsung phone to my TV’s soundbar when I wanted a richer audio experience than my phone’s speakers could provide. The initial pairing process was quick and easy, and once paired, my phone usually reconnects automatically when Bluetooth is enabled on both devices. I’ve also occasionally used a Bluetooth keyboard connected to my phone to navigate apps on my Samsung TV, which can be more convenient than using the TV remote for typing.